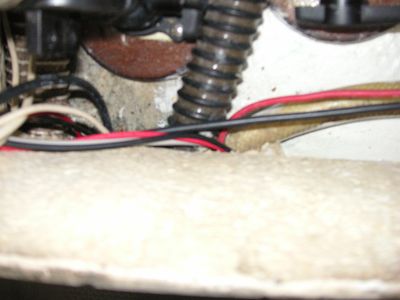
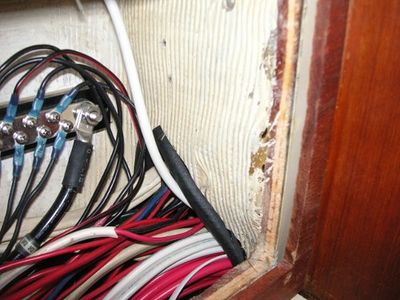
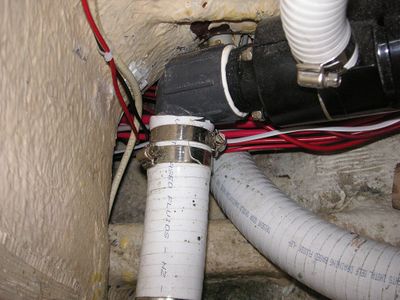
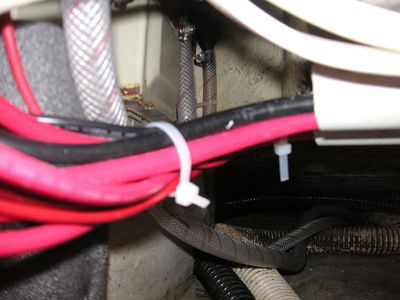
1987 MK 1 Catalina 34 Electrical System Upgrade
By Jon Windt; s/v Della Jean
REVISION A – 7-31-2016 Section 11 was revised due to re-routing of the #1, 5, and 14 1 AWG cables directly to the engine compartment from the house bank. The Cable Planner Excel and pdf files, and the pdf file of this write up have been upadted and attached to this write up to reflect the current routing. The schematic and cable ID #'s are unchanged, only the routing is different.
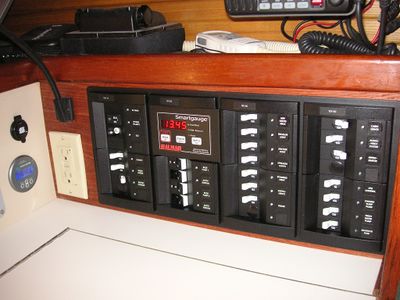
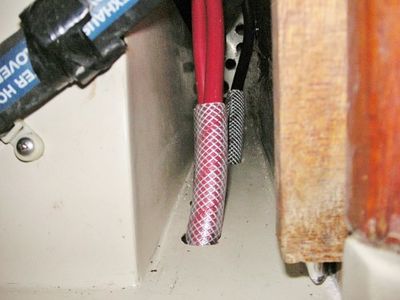
REVISION B – 10-11-2016 Section 10 was revised to change photo #74 to show the chafe guard I made from spare fuel hose used to protect wires passing through the bulkhead behind the Main Distribution Panel. The schematic and cable ID #'s are unchanged.
NOTE - Before doing any projects, I highly recommend that you first go through the “Critical Upgrades” list and verify that your boat has all of the applicable items addressed. There is a link on the Message Board (copied here) entitled “CRITICAL UPGRADES – DO THESE OR ELSE!!!” that will take you to them. It is a good way to both learn your boat and make sure it is safe. Don’t put it off.
Contents
- 1 General Vessel Description
- 2 Background
- 3 Before Photos
- 4 The Design Goals
- 5 House Battery Bank
- 6 Reserve Battery
- 7 Alternator & Regulator
- 8 Digital Echo Charge, Shunt, Negative House Busbar
- 9 AC Battery Charger
- 10 Main Distribution Panel
- 11 Wire and Cable Runs
- 12 Miscellaneous
- 13 Some Lessons Learned
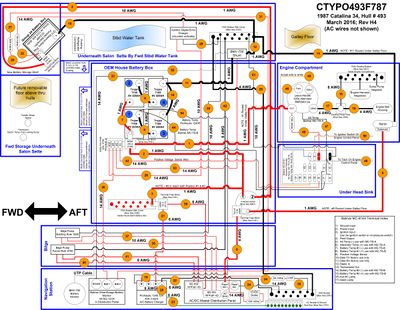
- 14 Schematic, Wire Detail, Voltage Drop
- 15 Parts Used
- 16 PDF of This Write-Up
General Vessel Description
I purchased my Catalina 34 in April 2015. She is a 1987 MK1, hull #493.
Mechanically she came with a M25XP 23 hp Universal (Kubota) 3 cylinder diesel, Hurth transmission, traditional packing gland, 3 blade 15x9 prop, keel stepped mast, Harken roller furling head sail, footed double reef main, standard rig with a fin keel, a standard rudder for 1987, a dodger with stainless steel tubing for the frame and hand holds over the companionway, and davits from Forespar for the 10’ 2” Walker Bay RIB dinghy/tender.
Electrically she came with 2 Group 24 105ah Trojan 12VDC batteries, a ProMariner Sport 20 AC battery charger, 12VDC refrigerator compressor, 1-2-Both battery switch mounted on the original OEM main distribution panel at the Navigation Station, 105A Leece-Neville (8MR2401UA) internally regulated alternator on the engine, a mix of LED and incandescent lighting throughout the cabin, IC-M422 ICOM VHF radio and a non-working Loran Navigation system both mounted at the Navigation Station, original engine control panel in the cockpit, non-working Autohelm ST3000 (1998 vintage wheel pilot), removable Command Mike with connection plug near the engine control panel in the cockpit, 5” display fish finder, removable GPS display and Tacktick at the helm.
Background
I am not an expert in marine electrical systems. I have been able to accomplish this upgrade only because of the breadth of documentation and the experts willing to share their knowledge and experiences that participate on the C34IA forum. I decided to write up my project as a way to pay back everyone that helped, and provide another, complete, reference for others wanting to do a similar upgrade to their boat. This is not a technical discussion on how things work. For that I recommend you read the Electrical Systems 101 in the Tech WIKI, and my posting 1987 MK1 Electrical System Upgrade – Feedback Requested for detailed discussion, graphs, and curves. This write up provides a complete summary of the electrical system upgrade I did with photos, plus attachments with cable/wire details, the final schematic, and a complete parts list of what I used. I've numbered the photos to help with connecting the text to the associated photo.
FYI - Before I hooked-up the batteries or turned anything on, I hired a marine electrician to inspect and approve my work, and the design, then sign & date the schematic for insurance.
So why do such a complex electrical upgrade? Like a good new owner, I first did all the items in the “Critical Upgrade” list for my vintage boat. While doing the engine harness critical upgrade, I noticed an upgraded 105A alternator, but the system including the main cables had not been upgraded. The alternator output cables still ran through the starter then ~ 20 cable feet to the C post of the 1-2-Both battery switch instead of direct to the house bank, all cables in the charging circuit were 4AWG, the lug terminals were OEM automobile grade wrapped in black electrical tape that was falling off. No marine grade heat shrink tubing or heat shrink terminals were present. My charging system needed to be upgraded for both safety, and being able to cruise for long stretches of time.
FYI - I realized the importance of heat shrink tubing and heat shrink terminals doing the engine harness upgrade. When I removed the engine control panel in the cockpit, the ignition wire and blower motor wires fell out of their crimps. No tugging on anything, they just fell out. They were corroded and without heat shrink terminals. Imagine trouble shooting that out at sea!
For me this was a very complex project, remember I’m brand new to this. Depending on your level of experience, it may be quicker for you. In total the project took about 250 hours. I spent about 125 hours reading the Electrical Systems 101 topics, previous project write-ups, and started my own thread 1987 MK1 Electrical System Upgrade – Feedback Requested to ask questions on the C34IA website. The outcome of this effort was a complete wiring diagram, a cable planner to identify each wire/cable and associated details, and a parts list. These are each available as part of this write-up in Sections 14 and 15 respectively for you to use as reference. There are both an Excel and a PDF formatted version. A jpg file of the schematic is shown here. If you click on the graphic it will enlarge like the photos do. Another couple of clicks on the image should give you a magnifying glass to zoom in further.
The next step was purchasing the parts, bringing them to the boat, and then spending about 125 more hours doing the actual work on the boat. Nothing was straight forward the first time around. It required lots of thought and decisions each step of the way. All in all, 85 DC and AC wires ranging in size from 16 AWG to 1 AWG have either been installed new, or the existing wires were re-routed, or re-terminated due to either corrosion, damage, making shorter runs, or to increase the number of separate grounds.
I checked everything as I went, whether or not it was part of the upgrade. Some examples I found that had nothing to do with the electrical upgrade are - My primary RACOR filter/coalescer is properly installed between the tank and the Facet lift pump but it had a 2 micron filter element, the Navigation Station desk bolts were about to fall off, 3 of 4 macerator motor mounting screws were loose, the heat shrink butt connector a PO (Previous Owner) installed on the new macerator motor was not heat shrunk, and the wire insulation on the motor positive wire had been worn away leaving a bare conductor. All loose bolts and screws are tight now, and the damaged wire replaced and properly heat shrunk. After reading several reports on which micron rating to install as the primary, I changed the RACOR filter element to a 10 micron element. There are several opinions on whether a 2, 10, or 30 micron element is correct. I went with a 10 micron because my tank is not as clean as it should be. I know this because when doing the Critical Upgrade to remove the filter at the end of the fuel pick-up tube in the tank, the rubber hose fell off the end of the tube. In fishing it out of the tank, I found the remnants of an old fuel level gauge laying on the bottom. To remove the hose and old level gauge I pulled up pieces of debris from the tank bottom. I would have cleaned the tank, but there are no removable covers to do that. So how did I get the old hose and level gauge out? I was working blind through the small opening for the level gauge. Fuel system work, including the tank is a future project.
As a final note, every boat is different. The routing and methods I used and wire/cable lengths may not work on your boat. Please read this as a summary of what I did, not as a manual of what you must do. This is one way, not the only way. Good luck and I hope you find this write up helpful.
Before Photos
The following photos show the boat before the electrical upgrade. The text description for each group of photos is above them. They are provided to help give you a picture of the starting point.
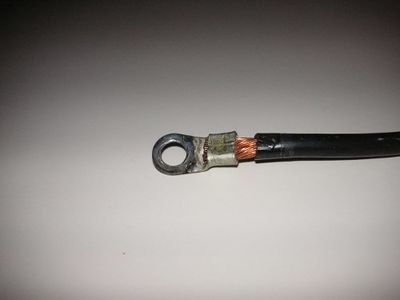
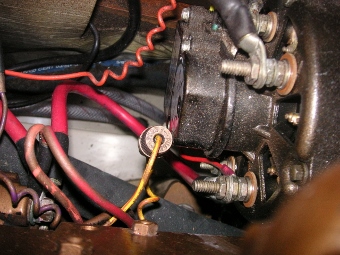
Photo (1) is one example of a negative battery cable and lug with electrical tape removed. Notice the crimp terminal and the exposed wire end by the ring. Photo (2) is looking down at the original red 4 AWG cable from the 105A alternator output to the starter. The other red 4 AWG cable runs from the starter, ~ 20 cable feet to the 1-2-Both switch at the Navigation Station. From there it ran another 15 cable feet to the battery in the battery compartment.
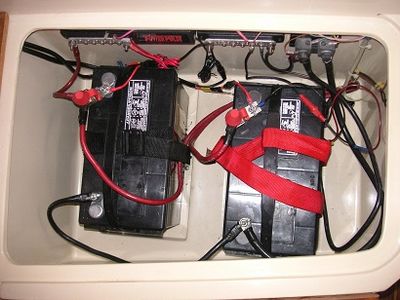
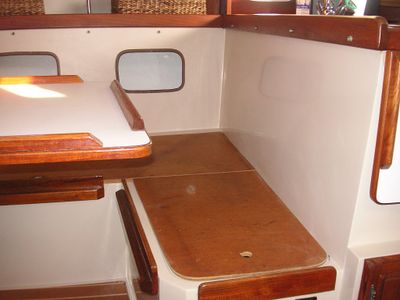
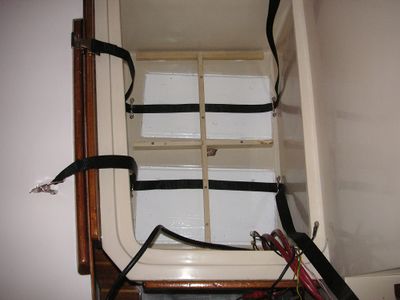
Photo (3) is the outside of the OEM battery compartment showing no ventilation openings. The switch in the upper right inboard side of the battery compartment is where the auto/on/off bilge pump switch was originally located. Photo (4) shows the original 2x Group 24 batteries, the 2 busbars, a Power Pulse battery maintenance widget, and a shunt for the Link 10 inside the battery compartment.
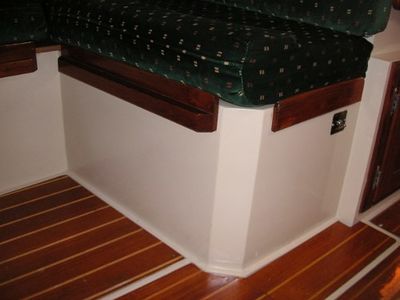
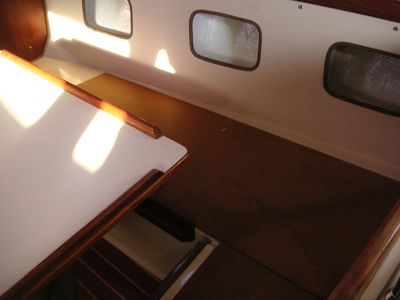
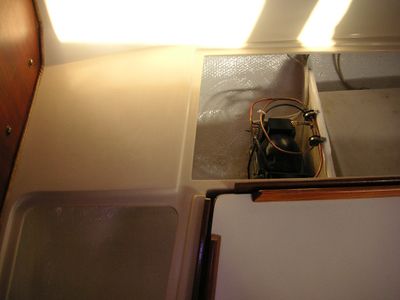
Photos (5) through (7) are of the traditional C34 salon area with all of the cushions removed. The black cover in the Photo (6) is the existing ventilation cover for the DC refrigerator compressor.
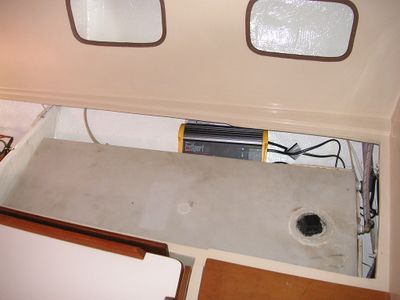
Photos (8) and (9) show the salon area with the wood covers removed. In Photo (8) you can see the fridge compressor attached to the bulkhead at the end of the starboard water tank. Photo (9) shows the water tank and ProMariner ProSport 20A AC charger. The wire from the breaker to the charger had a 3 prong plug connection (like an extension cord) at the charger, and the charger wasn’t fastened to anything, just lying there on the hull waiting to flop around. Not very robust.
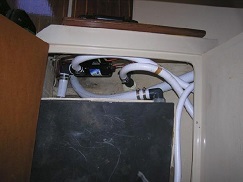
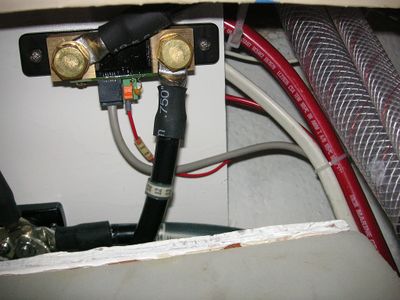
Photo (10) shows the holding tank, macerator pump, hoses, and if you look close the original wiring and cables running up to the master distribution panel at the Navigation Station.
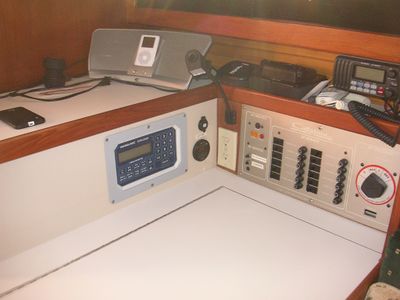
Photo (11) shows the Navigation Station with the OEM Main Panel, Link 10 battery monitor and 12VDC outlet installed by a PO. The panel has a single pole main, the polarity lights flickered, the lens for a light and the light under the battery switch were missing, the Link 10 did not operate.
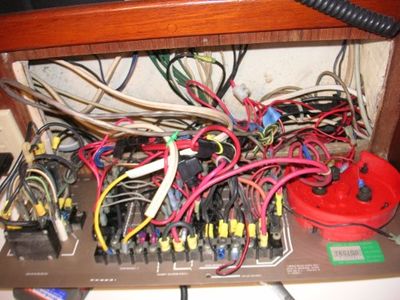
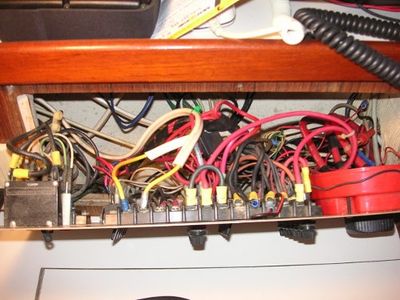
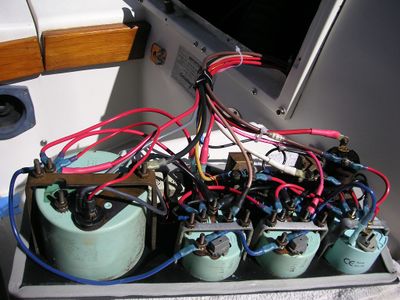
Photos (12) and (13) show the wires behind the main panel. To be polite, it was a corroded mess.
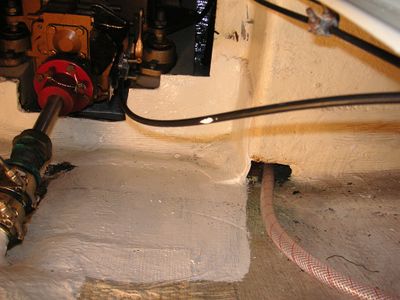
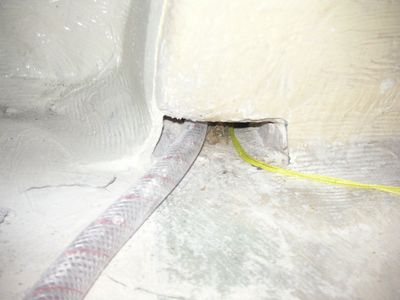
Photos (14) and (15) are taken under the aft cabin with the cushions and wood cover removed. My original plan was to run the cables from the battery compartment under the cabin floor and engine compartment through a hole in this area. (I recently painted this area with white bilgekote when I replaced all the fresh water and vent hoses). In Photo (14), you can see 2 small pilot holes I drilled under the port engine mount. I drilled the pilot holes about 1” deep but did not break through. So I plugged the pilot holes with hardwood dowels and 3M 5200 and changed plans. My fall back plan was to run the cables through the opening shown in Photo (15) where the water hose from the aft tank went under the cabin floor to the sink area.
Barely visible in photo (16) is a dark clump of old adhesive sitting in the opening to the right of the aft tank water supply hose. It appeared to be excess adhesive for the conduit from the original build of the boat. A light tap with a screwdriver removed it, and now the path is clear to pass the 1 AWG cables through. The yellow strings are messenger lines to pull new cable. However, I found that I could reroute the hot and cold water hoses to the head sink between the manual bilge pump hose and the shower drain hose and reuse the now unused holes in the engine compartment to run the #1, 5, and 14 cables. See photos 55-57 for more clarity. This pass through from under the aft cabin to the galley will be used for my electric 1 1/8" bilge pump hose.
The Design Goals
- Locate all components to be easily accessible and serviceable with minimal effort.
- Utilize existing openings in the boat to run cable and wire, do not drill any new holes in the boat for cable and wire runs.
- Replace the existing pair of Group 24 105Ah batteries with 4 6V 225AH golf cart batteries wired series/parallel for the house battery bank. Add a single Group 24 or 27 maintenance free 80-100AH 12V deep cycle battery as a reserve. A reserve deep cycle was chosen to be able to fill start, critical, and limited house load needs for redundancy.
- To minimize contents within the battery compartment, remove bus bars, and shunt leaving only batteries and required fuses in the battery compartment where possible.
- Size wire and cable per ABYC using 105°C stranded tin-plated copper boat cable.
- Connect the alternator output directly to the house bank positive with proper fusing.
- Relocate the 1-2-BOTH switch to the battery compartment wall to align with the current ABYC code, and remove the switch from the charging circuit changing it to a battery use switch only.
- Add 2 black ventilation covers to the battery compartment to match both the existing black ventilation cover for the refrigerator compressor, and its vertical height.
- Replace the alternator’s internal regulator with a Balmar MC-614H external regulator with battery and alternator temperature sensing to allow rapid and safe recharge.
- Install a Xantrex Digital Echo Charge to automatically charge the reserve battery from the alternator, the AC charger, and a future solar panel or wind generator system.
- Replace the existing 20A AC battery charger with a ProNautic model 1240P three-stage 40A AC charger with temperature sensing to meet the needs of the new larger house bank. Mount under the Navigation Station desk vertically per manufacturer’s instructions.
- Replace the inoperable Link 10 battery monitor with a Victron BMV-700 to monitor house battery bank voltage, amps in and out, and Ah’s consumed over time, plus add a Balmar SmartGauge to measure voltage and State Of Charge (SOC) of both the house battery bank and the reserve battery.
- Replace the OEM AC/DC Main Distribution Panel with a new breaker panel. New panel to include 2 bilge pump switches, more AC and DC breakers with at least 2 spares for each, a 2 pole ELCI Main AC breaker, and space for a SmartGauge battery monitor.
- Remove the existing OEM AC terminal strip behind the main distribution panel and replace it with one 10 screw and one 5 screw dual buss bar for the AC system.
- Identify a location and leave room for a future electric windlass breaker/switch.
- Revise the DC and AC wiring and over current protection system (fuses) to accomplish the above requirements and conform to current ABYC codes.
House Battery Bank
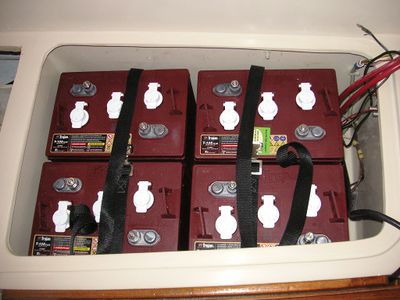
I followed others and used four Trojan T105 deep discharge 6V 225AH golf cart batteries. It is a tight fit. The batteries have to be installed in the sequence of inboard aft; inboard forward; outboard aft; outboard forward, but they will fit into the existing battery box of Mk I boats. I considered using four US Battery 2200 6V 232AH golf cart batteries due to the slightly higher Ah rating, but they were taller and I wasn’t confident they would fit with the wood cover installed. In hindsight the additional ~½” in height would have worked. This is something I’ll consider in the future when I need new batteries. Golf cart batteries are used in large numbers for golf carts, so the price is reasonable and are readily available. I purchased mine from a local battery supplier with free delivery to the boat. They even gave me a carrying strap, a real back saver when installing and removing the 62 lb batteries numerous times to fit the “egg crating” I made. An additional hidden benefit here is that the additional ~310 lbs of the four house batteries plus the reserve battery installed on the starboard side helps to offset the port list present in C34s.
The Trojan brand model T105 batteries are an industry leader in quality, and life. They have thicker plates and built to take more of a pounding. They must be connected in series/parallel to supply the 12VDC at the Ah capacity desired. In this set-up they offer a high power density of 450Ah in a small space. Compare this to the 105 Ah’s of the original Group 24 house battery I had.
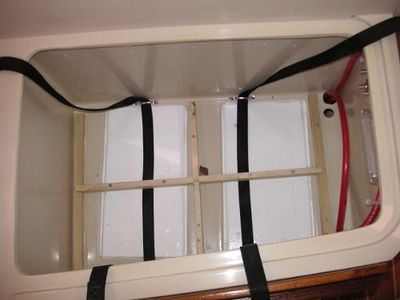
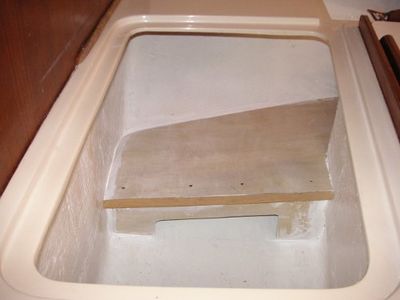
House Battery Box Issues: The OEM battery box has 2 recessed pans for the original batteries to sit in. In order to convert the battery box from a 2 battery arrangement to using 4 6V golf cart batteries, these recessed pans need to be filled or covered to make a flush surface for the batteries to sit on. The entire surface must be flush so they don’t “rock” or have a point load that may cause a battery failure.
To keep the batteries as low as possible in the battery box I elected to fill the recess using a 2x8 piece of wood. I cut it into 2 ~14 ¼” long by ~1 9/16” thick pieces and chamfered the bottom to fit the recessed pan radius and painted them with white bilgekote. I countersunk screws to fasten them to the bottom of the recessed pan, then used a white silicone caulk to fill the gap between the wood edges and the pan. CAUTION - In my case each pan size was slightly different, so I had to customize each to fit and have a flush surface. Measure yours to get your dimensions before cutting anything. An alternative to filling the recess is to use a plywood cover with a support underneath in each recessed pan. The down side to this method is reduced height.
Photos (17) and (18) show the 2x8 painted wood fillers, the “egg crate” made from ¾” x ¾” hardwood strips screwed and countersunk to the bottom, and the battery straps all to keep the batteries in place while underway. Photo (18) shows 2 existing holes in the bottom of the box with new cables passing through. (I was later glad to have 2 entry holes). I drilled holes for #8 screws for wire ties along the upper battery box wall, and 2 thru holes for #8 screws in the radius at the bottom of the box on the water heater side. These are to attach wire ties outside of the box near the water heater for the cables that will run in that area. The 2 thru holes were covered with the same silicone caulk used earlier to seal them from a possible battery leak. Be sure the screws do not extend into the battery box or you’ll damage the batteries.
I didn't want to make the final attachments, and then find out the tie down straps interfered with the fill caps on the batteries. So I temporarily installed all of the house batteries to ensure the eggcrate matched up as intended, and the battery straps didn’t interfere with the battery fill caps as shown in photo (19).
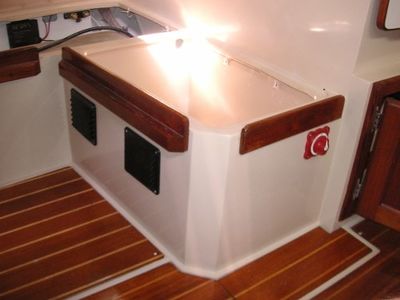
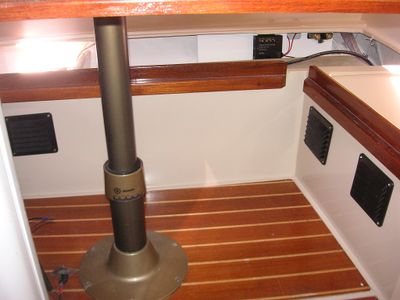
Photos (20 and (21) show the 2 new black ventilation covers installed in the battery box and the 1-2-Both battery switch installed where the bilge pump auto/on/off switch used to be. (In the background of photos, you can see the breadboard for the Xantrex Digital Echo charge, house negative busbar, and BMV-700 shunt, but more on that later). The battery switch is a Blue Sea 6007 installed with the front panel mounted option. I used a 2 5/8” Milwaukee Dozer hole saw to drill the hole for the battery switch. It was tricky since I was using the hole saw to enlarge the existing smaller bilge switch hole. The battery box is two walls that are hollow in between. I wedged a piece of wood into the hollow section to give the hole saw pilot bit something to grab on to. I lined up the hole saw with the top of the existing bilge switch hole and went for it. It worked, but maybe not the safest couple of minutes I spent on this project.
I used the same 2 5/8” hole saw for the vent covers along the forward side of the battery compartment instead of buying a larger hole saw for two holes. This surface is also two walls and hollow in between. To avoid gases collecting, I rolled up paper towels and stuffed them inside just below the edge of the hole to act as a backing for the caulk I used. The caulk provided a seal with a nice finished appearance as can be seen in photo (22).
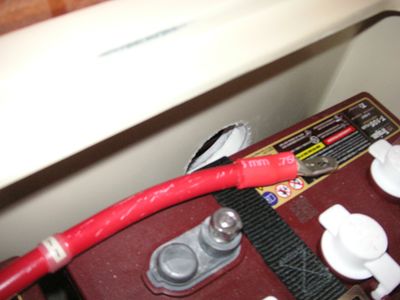
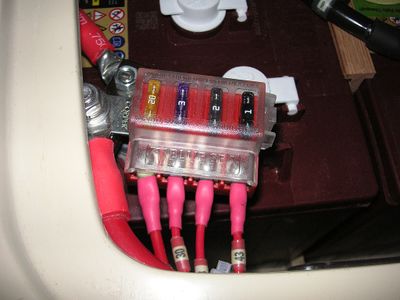
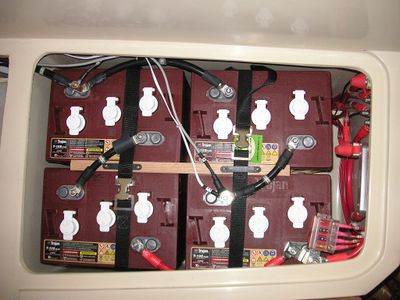
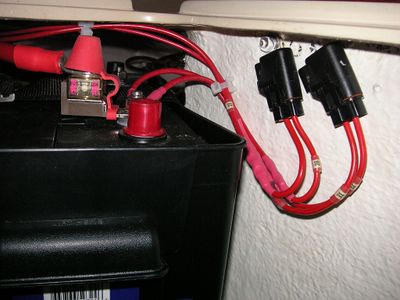
Photos (23) and (24) show the Trojan T105’s installed waiting for inspection. I used the Blue Sea 5024 fuse block in the photo (23) to combine 4 fused runs into one small space with one connection point directly on the battery. The battery posts are short allowing connection of only 2 lugs comfortably. Many devices require connecting directly to the battery or as close as possible for best results, and is preferred by ABYC code. This does that neatly. In photo (24) I cut a piece of red oak into a “T” shape to fit between the batteries to avoid them tipping together when the battery strap is tightened. The black plastic clips came with the NAPA battery box for the reserve battery. I’m using a higher quality battery strap and stainless steel clips to hold the reserve battery to the shelf, so I decided to use the plastic clips here to keep the wood from sliding. The house bank connects to position 1 on the 1-2-Both battery selector switch. In photo (24), the schematic battery ID #’s starting from the bottom right are #1, bottom left is #2, upper right is #3, and upper left is #4. See the schematic attached in Section 14 of this write-up for the details.
Reserve Battery
Adding a large capacity house bank is great, but what if there is a problem? To solve that I added a single 12V reserve battery and installed it in a battery box I purchased from a NAPA auto parts store. I call it reserve instead of start because it will be able to fill both start, critical, and limited house load needs in an emergency. The Universal diesel is small compared to automotive engines, so I used a Group 24 Maintenance Free 12V, 80Ah, 650 CCA deep cycle battery used in RV’s. I have the room to install a Group 27 on the shelf, but wanted to keep as much storage space as possible so stayed with the Group 24. A Group 27 battery box will fit in this space and would be needed if I change to a Group 27. FYI - After completion of the project, the Group 24 80Ah, 650 CCA deep cycle battery started the engine as easily as the house bank.
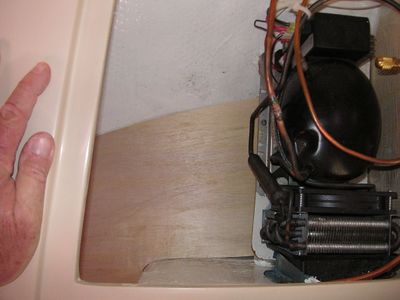
The most common location others install a reserve/start battery on a C34 is under the aft cabin. When I looked at under aft cabin installations, although done well, it was cramped, dark, wet, and hard to service. I chose to add a shelf under the forward outboard starboard corner section of the salon shown in work in photo (25). A loss of storage area, but my storage is limited here due to the refrigerator compressor anyway which you can see in phot (26). Using ½” birch plywood I fabricated a shelf to match the hull, bulkheads, and refrigerator compressor shelf. I cut an opening in the vertical leg of the new shelf for water drainage and access. The underside was painted in the non-bonding areas with white bilgekote before final installation. The hull and bulkheads were sanded for good adhesion, I then used 3M 5200 to bond the shelf to the hull and countersunk screws to bond the top and vertical leg of the shelf together. The screws were covered with a ½” cove molding for looks and a little additional ledge surface to help when removing the battery. The reserve battery was used as a weight to apply pressure while the 3M 5200 cured. The exterior is finished with white bilgekote.
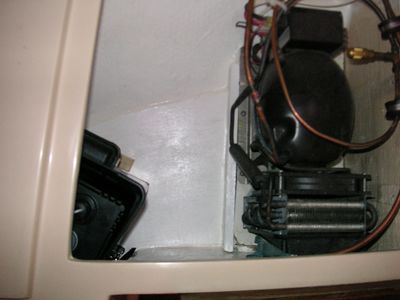
I added hardwood strips, and the same type battery strap as the house bank to keep the battery box from moving while underway. The terminal posts and all fuses shown in photo (27) are easily accessible by removing a cushion and the wood cover. The SmartGauge and Digital Echo charge in-line fuses are shown mounted on the bulkhead. I also have space to stow a small tool bag as shown in photo (28).
In photo (29) you can see that this arrangement also provides space for a future electric windlass breaker to fit between the battery and fridge compressor.
Alternator & Regulator
Connecting the alternator directly to the house battery is a better arrangement than passing the charging circuit through a 1-2-Both battery switch as done in the stock Catalina wiring. Besides improved charging characteristics, it avoids damaging alternator diodes by opening the charging circuit with the 1-2-Both switch while charging. In my system the alternator output connects directly to the house bank avoiding this potential failure. I continue to use a single 1-2-Both switch, but it’s now only a battery bank selection use switch that outputs to the Main Distribution Panel and the starter.
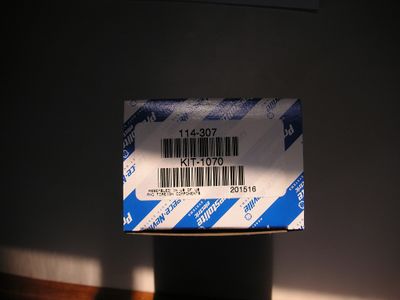
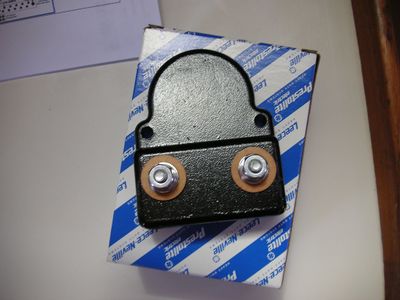
Internally regulated alternators are not designed to periodically recharge a large discharged battery bank rapidly. Technical details and graphs on this subject are discussed at length in my posting 1987 MK1 Electrical System Upgrade – Feedback Requested, and in Electrical Systems 101. To take advantage of my existing 105A alternator, I installed an external regulator. This requires a conversion kit for Leece-Neville I purchased from ASE Supply Inc. Photo (30) shows the part # 114-307, Kit 1070. Photo (31) shows an outside view of the assembled kit before installation.
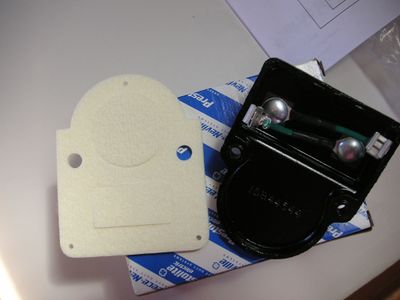
Photo (32) shows an inside view of the same assembled kit before installation.
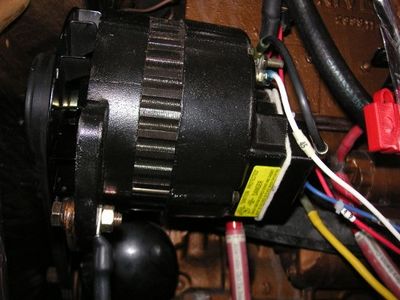
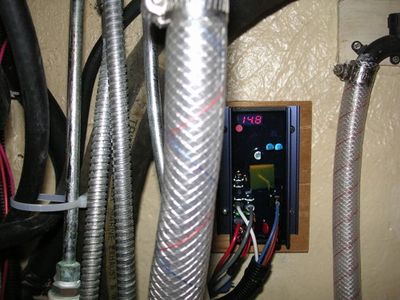
I used the Balmar MC-614H external regulator with the 54” long harness, and installed both battery and alternator temperature sensing. To attach the alternator temperature sense wire to the alternator I replaced the original 1” long alternator bracket screw with a 1 ¼” long grade 8 screw as shown in photo (33). The MC-614H is installed under the head sink attached to a piece of ¾” plywood bonded to the bulkhead. It is easy to read the display and use the reed switch for adjustments as shown in photo (34). The regulator wires run to the engine compartment in the split loom. The existing ¾” conduit under the shower pan is used to connect the positive sense wire to the house bank, and the regulator negative to the house negative busbar after the shunt.
In photo (35), the brown ignition wire, ID # 50, connects to the ignition switch in the cockpit. The gray material around the perimeter of the cockpit panel is foam tape for weather protection when installed. FYI –I set the belt manager to level 4. The engine was started and run at 1500 rpm. The alternator was charging the house at 80 Amps, the alternator was at 32°C and the house bank was at 18°C. Just like advertised!
Digital Echo Charge, Shunt, Negative House Busbar
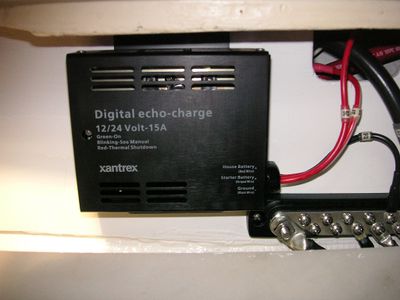
I have a reserve battery for redundancy, but now need to make sure it is always charged and ready to be used. This is done with a Xantrex Digital Echo Charge which is connected between the house bank positive post and the reserve battery positive posts. It will be installed on a vertical breadboard bonded to the hull outboard of the starboard water tank.
Photo (36) shows the vertical breadboard that is made out of ½” birch plywood cut to match the hull shape and the underside of the storage area behind the starboard salon seat where it’s dry and has good ventilation. Before installation, I located all the parts to be mounted on the breadboard for best fit of the cables, and screws, then drilled the mounting holes. I then cut a notch into the top edge of the breadboard to make a pass through for the cables and wires to run. The breadboard extends from the end of the water tank ~24” forward and sits back from the fiberglass opening to the water tank ~4” to protect the components from falling items or liquids. The breadboard was then painted with white bilgekote on all sides except for the bonding surface. The hull bonding area was sanded and the breadboard was bonded to the hull and underside of the storage area with 3M 5200. It was held in place with wood shims to apply pressure as it cured as shown in photo (37).
Photo (38) shows the bottom of the breadboard matched and bonded to the hull. After drying, it was repainted with white bilgekote before installing the components as shown in the next group of photos.
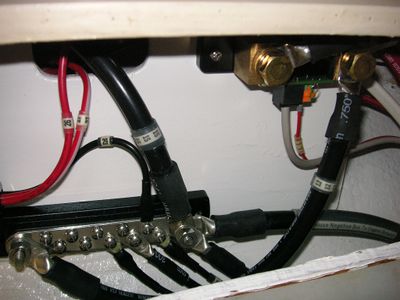
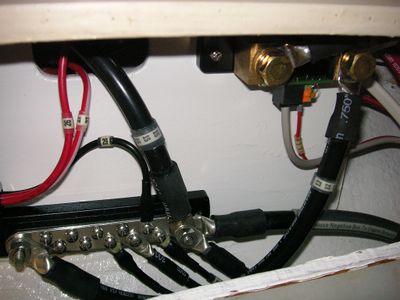
In photo (39), the Digital Echo Charge is shown installed and wired. The busbar comes with a cover that is removed for clarity. Installing the busbar and the wires connecting to it requires a stubby screwdriver due to limited space between it and the water tank. Photo (40) shows the house negative busbar with negative wires connected and labeled. The 1AWG negative cable to the main engine ground is on the right. The 1AWG negative from the shunt crosses over to the far left post on the busbar.
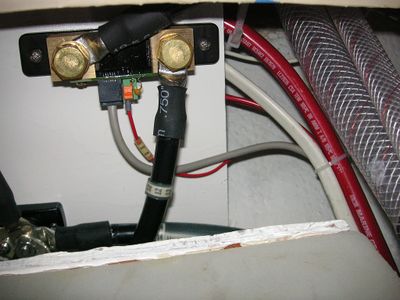
In photo (41) you see the shunt for the BMV-700. The house bank negative is connecting to the brass bolt on the left. This orientation of the shunt was used to have the battery monitor connections pointing down to reduce stress on the wires, and avoid condensation from humidity seeping into the connection points.
AC Battery Charger
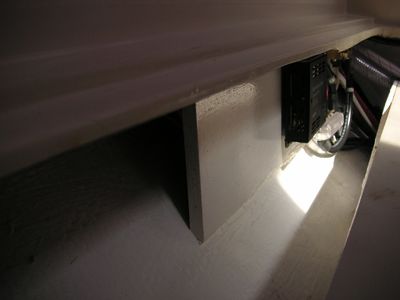
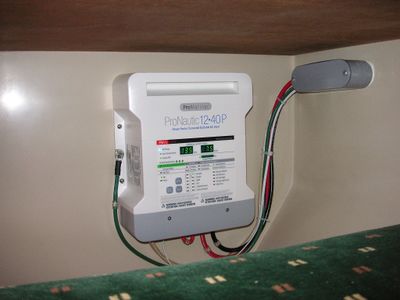
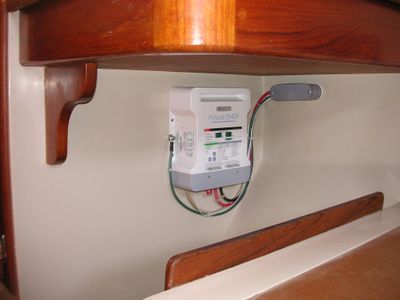
I removed the original ProMariner ProSport 20A AC battery charger that was lying on the hull unattached to anything, and replaced it with a ProNautic 40A multistage smart charger. The ProNautic uses battery temperature sensing, and can be programmed for several battery types and profiles for safe and efficient charging. I installed it with 4 screws on the common hanging locker bulkhead underneath the Navigation Station desk, see photos (42) and (43). This allows vertical mounting with plenty of ventilation in a relatively cool dry area. The location does not interfere with my knees when sitting at the desk, but is close enough to get at and change programming if needed. The AC charger wires run through the outboard bulkhead through a conduit LB under the Navigation Station desk. This reduces wires running in the hanging wet locker, provides a shorter run to the back of the Main Distribution Panel which is directly above it, and the conduit LB hides the hole.
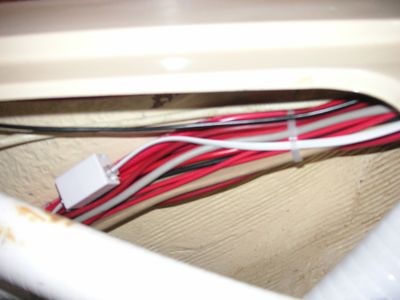
Unfortunately the temperature sense wire provided with the charger is only 10 feet long and will not reach the house bank from here. To solve this, ProMariner suggested using an RJ6 phone coupler and an RJ6 telephone line the length needed. Photo (44) shows the RJ6 phone coupler and the added 12 foot RJ6 wire tied to the main wire bundle just before the macerator pump/motor. Not sure yet if I’ll plug the open RJ6 phone coupler ends with butyl tape and rescue tape to seal it from mositure.
Main Distribution Panel
Photo (45) shows the Navigation Station with the new Blue Sea 360 Main Distribution Panel installed. The AC power is on the left side of the panel with a new ELCI 30A double pole main breaker, separate outlet, water heater, and AC battery charger breakers, plus two spares. Moving to the right is the SmartGauge battery monitor located above the bilge pump restricted off and manual on breakers, the right two columns are the 14 DC breakers plus 2 spares. One of the spares will be used for the future auto-pilot. Photo (46) shows the BMV-700 battery monitor and the 12VDC outlet that are installed on the bulkhead shared with the hanging locker, and to the left of the GFCI outlet.
Photo (47) shows the cables from the back of the BMV-700 and the 12VDC outlet in the hanging locker running through the bulkhead, and behind the main panel.
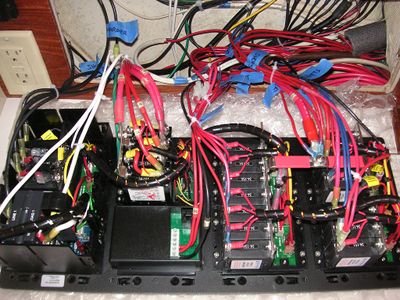
In photos (48) and (49), more breakers means more wires connecting to the main panel, but the organization of the wiring has been improved from the original.
Here in photo (50) you see the wire bundle going by the macerator pump and motor up to the main distribution panel higher than before to get them off the hull and out of the way.
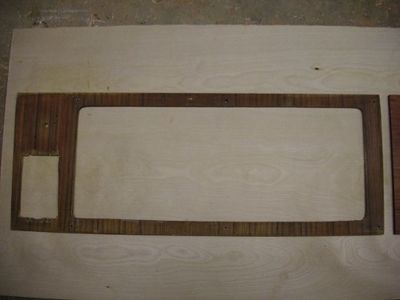
I also replaced the old ¼” teak plywood with a new piece of solid teak 5/16” thick. The new teak is shown in photo (51) and the old is shown in photo (52). The new teak improvement is more dramatic in person, and is seen a little better in photos (53) and (54). New is shown in photo (54).
AC Busbar Replacement: I removed the original terminal strip in photo (53) and replaced it with a 10 screw dual busbar and a 5 screw dual busbar as shown in photo (54). In photo (53) you can see dark spots under the screw at the end of each wire. Those are corroded spade fittings with open crimps at both ends. I removed and replaced all with heat shrink adhesive lined ring terminals. They are now all nice and shiny new in photo (54). The 10 screw dual busbar is for most AC neutrals and all grounds. The smaller 5 screw dual busbar is dedicated to line and neutrals for the cabin, galley, and head protected AC outlets. The AC outlet power leaves the panel breaker and connects to the GFCI outlet at the Navigation Station. From there it connects to the 5 screw dual busbar for the downstream AC outlets, and is labeled “Protected Outlets”. In this arrangement the cabin, galley, and head outlets are all protected by the Navigation Station GFCI outlet. The down side to this arrangement is the AC outlets are limited to a combined total of 30A. This may or may not be a nuisance item. I plan to wait and see if it is an issue before changing anything.
Wire and Cable Runs
All new wiring and cables are Ancor brand 105 degree C rated, stranded, tinned marine boat cable. All lugs are Ancor or FTZ tinned copper, crimped with a quality crimping tool that stamps a number on the lug when properly crimped. The adhesive lined heat shrink tubing for the 8 AWG and larger is a thicker Mil Spec type. All 10AWG and smaller ring terminals and butt connectors are Ancor, or FTZ brand marine adhesive lined heat shrink ring terminals or butt connectors. In some areas I also used non MIL Spec adhesive lined heat shrink tubing for stress relief on the smaller gauge wires. All cables 6 AWG and above were labeled with a “to and from” naming convention plus an ID number. Only an ID number was used on the wires 8 AWG and smaller. The ID number on the wire or cable matches the wire or cable ID number in the schematic. I also heat shrunk clear tubing over the name and ID number or just ID number to protect it per Maine Sails advice. I used adhesive lined clear tubing. It works but it is cloudy. Use clear heat shrink tubing that is not adhesive lined to get a clearer result.
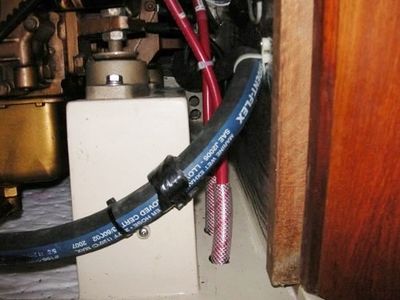
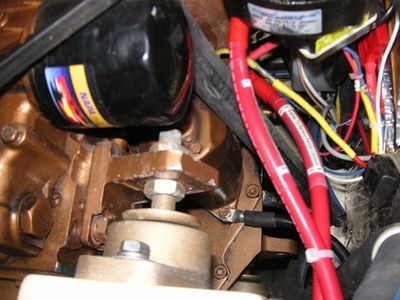
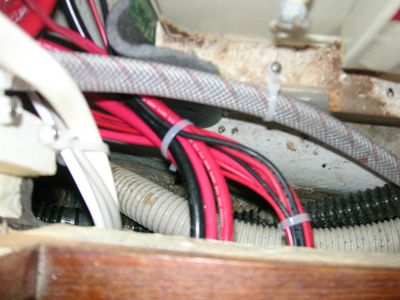
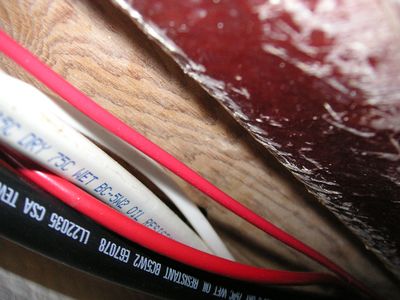
For the primary battery and charging circuit cables I used 1 AWG. There was a lot of discussion on what is the proper cable size to use on the Message Board. Refer to my post 1987 MK1 Electrical System Upgrade – Feedback Requested. The following photos (55) and (56) show how the starter, alternator output, and main negative (from the house negative busbar) cables run under the floor between the galley sink and enter the engine compartment where the hot and cold water hoses to the head used to be. I drilled a third 1” hole aft of the first two for the main negative to pass through. I was able to re-route the hot and cold water hoses directly to the head sink. There was just enough room for the two hoses to slide between the shower drain and the manual bilge pump hose. This is a shorter hose run to the head sink than the original route, which went from the galley sink area through the engine compartment, around the aqua lift muffler then back and up to the head sink. I used some of the extra ½” hose for chafe protection where the cables pass through the engine compartment floor.
Photo (57) shows another view of the same three cables rising up to the alternator, starter, and main negative cable #14 connection on the starter motor mounting bolt.
In photo (59) you can see I added insulation foam for ¾” pipe on the water tank hose and band clamp to protect the cables and wires from chafing.
Photo (59) shows cables running between the water heater and the outside of the battery box. The wire tie mounts are attached to the thru holes I drilled in the battery box in the beginning. No other way to get in there and drill a hole. Photo (60) shows another use of the insulation material to cover the corner of the water heater support and shelf to avoid any cable or wire chafe. The insulation is attached to the heater shelf with a #8 SST screw fastened to the wood shelf so it doesn't move and leave the wires/cables exposed to the corner.
Photo (61) shows the cables entering the bottom of the battery box thru the larger of the two existing holes and connecting to the back of the 1-2-Both battery selector switch in the battery box, the “always on” busbar, and the house battery bank. Remember I said I was glad there were two holes? This is why, it is big stuff. NOTE: although the battery selector switch posts extended into the battery compartment, the back of the switch was slightly recessed so I was not able to tighten down the cables. Adding a SST washer to each post allowed me to tighten each post and get full contact as required.
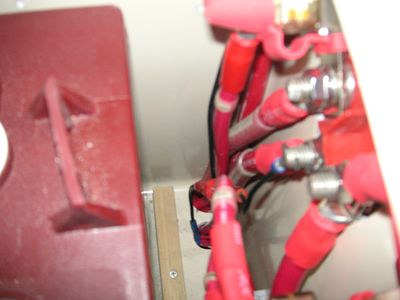
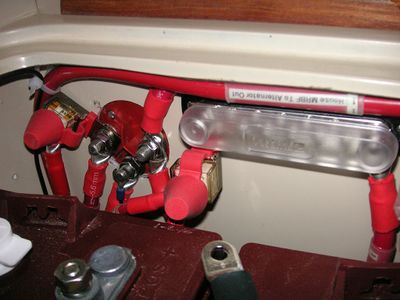
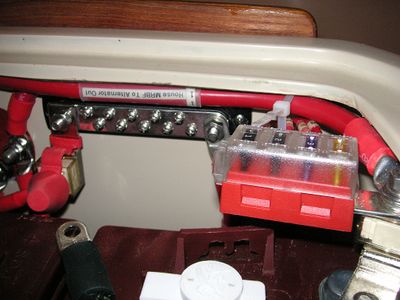
Battery Box Busbar: Photos (62) and (63) are looking inboard from the water tank to see inside the battery box. Photo (62) shows the primary cables inside the battery box connecting to the back of the 1-2-Both battery use switch. Position #1 (house bank) is on the right, Position #2 (reserve battery) is on the bottom, and Position C is on the left. The MRBF fuses (covered with the red caps) for the main distribution panel supply connecting to the C post, the AC battery charger, and power for the bilge pump breaker connecting to the “always on” busbar can also be seen. Photo (63) shows the alternator output cable running above the “always on” busbar. The protective cover is removed from the “always on” busbar for clarity. The alternator output cable is labeled upside down so it can be read from above when standing on the boat centerline looking down into the battery box. You can also see the jumper connecting position #1 of the 1-2-Both battery use switch to the “always on” busbar. The most critical DC item currently attached to the “always on” busbar are the bilge pumps. If the house battery bank were to fail, switching the 1-2-Both battery use switch to position #2 would not provide power to the always on busbar. To address this, I made the jumper long enough to be moved from position #1 to position #2 of the 1-2-Both battery use switch to provide temporary power. This failure mode is a remote possibility, but it could occur so I added this no cost redundancy feature.
In photo (64), you see the end of the Blue Sea 5024 fuse block discussed in the House Battery section.
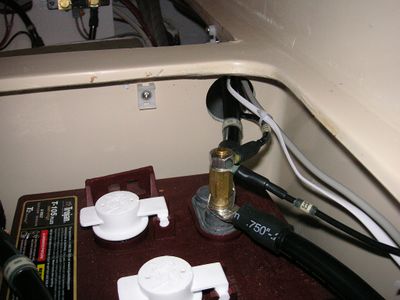
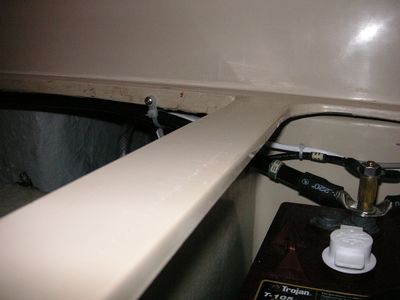
Looking at the bulkhead between the battery box and water tank in photo (65), you see the 1 AWG negative leaving battery #4 and going to the shunt through the hole in the battery box. Also visible are the temperature sense wires from the AC battery charger, and from the Balmar external voltage regulator. I separated most of the positive wires from the negative wires by running the positive’s into the battery box through the two bottom holes shown earlier, and the negatives and temperature sense wires running through this hole at the top of the other end of the battery box near the water tank. I was only comfortable connecting two wires or cables to a battery post, so I purchased the extension from the battery supply house for ~ $5. In photo (66), the 1AWG negative leaves the battery box and runs under the lip that the outboard salon cushion wood cover sits on.
That same cable then connects to the left bolt on the BMV-700 shunt attached to the breadboard as shown in photo (67).
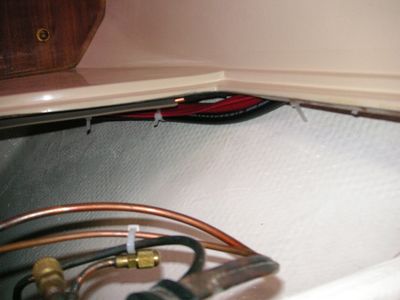
Photo (68) shows the positive and negative cables running to the reserve battery from the Digital Echo Charge, the SmartGauge, the 1-2-Both battery selector switch position #2, and from the house bank negative busbar. The shiny bit you see is the refrigeration line. To protect the refrigeration lines in case there is a gas leak from the maintenance free battery, I covered it with the material used to cover wires on the floor so you don’t trip. Photo (69) shows the wires and cables from the reserve battery, Digital Echo Charge, and the SmartGauge running underneath the storage cubby holes behind the outboard salon seat cushion. The white Nomex is the existing DC wiring for the refrigerator compressor and fan. The wood you see is glassed in and is part of the boat. It wasn’t added by me for this project.
The 1 AWG negative continues to the breadboard where it passes through the cutout to connect to the right post on the house negative busbar as shown in photo (70).
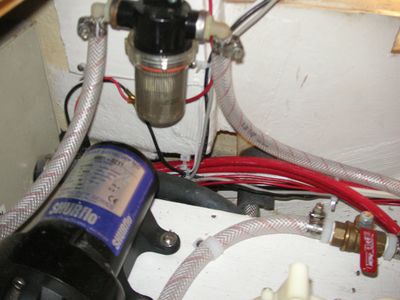
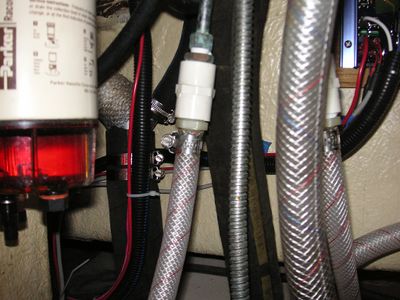
Photos (71) and (72) show the external regulator wiring under the head sink in the split loom, then is runs along the engine compartment bulkhead under the Racor filter.
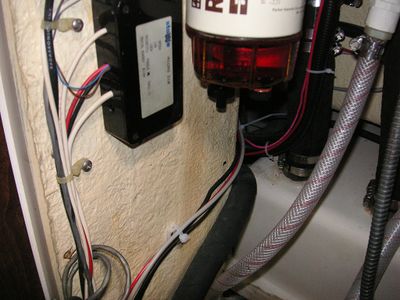
Photo (73) the external regulator wires enter the ¾” conduit under the shower pan. They exit the conduit by the macerator pump/motor in photo (76) of the next photo group. The black box by the Racor is part of my non-working depth/temp/speed system.
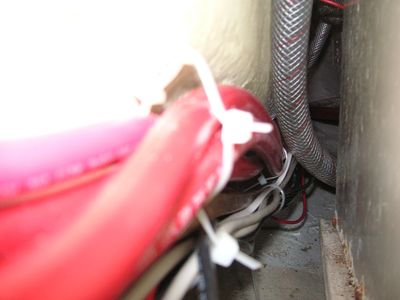
Finally photos of the wires running from behind the Main Distribution Panel, to the battery box area. Photo (74) shows the bundle exiting from behind the Main Distribution Panel with a chafe guard I made from some extra fuel hose, and photo (75) shows where they pass under the macerator pump/motor and pick up the external regulator wires.
Photo (76) is where they cross over above the bilge. The hoses lying on the hull are for the hot and cold water to the head and the existing manual and electric bilge pumps.
Miscellaneous
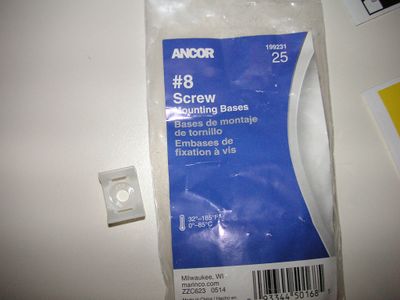
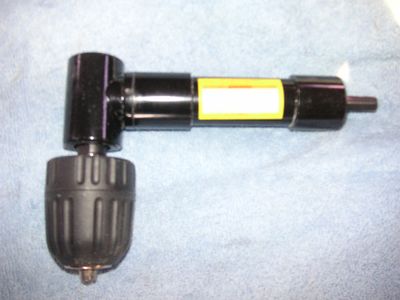
Lots of wire ties are used throughout to secure the wire and cable. A great fitting I used is #8 mounting bases; Ancor part # 199231 from West Marine shown in photo (77). Drill a hole for a #8 screw, screw it in, slip the wire tie through the slots, wrap around the wire/cable and tighten. Very secure. A valuable tool to have is a 90 degree drill. I didn’t have one, so bought the 90 degree adaptor shown in photo (78) from Harbor Freight for ~$20 before shipping and handling. It’s a light duty tool, but worked well to get into tight areas to drill holes I wasn't able to without it.
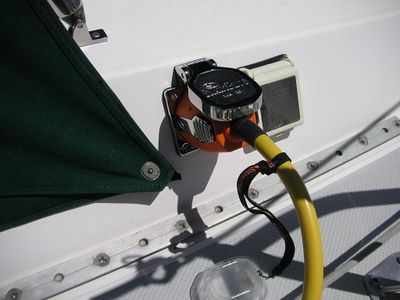
Photo (79) shows the final upgrade in this extensive electrical upgrade. What I thought would be a quick 30 minute job, turned out to be about 1 1/2 hours. The reason being the OEM boatside AC wire terminations to the old shore power connection used ring terminals (not heat shrunk by the way), with zero slack in it. When the ring terminals were cut off, the stripped wire conductor would not reach the SmartPlug terminal. To solve this, I added 8-10" long 10AWG pigtails to each conductor of the OEM 12 AWG cable with adhesive lined heat shrink butt connectors. Worked fine, and in the end I replaced my original twist on AC shore power plug with the more secure SmartPlug assembly, a new cable, and the optional protective cover that can be used when the plug is disconnected from the boat. The cover to the right of the SmartPlug is an old Marinco fitting for cable and telephone. It isn't connected to anything that I can find and will eventually be removed. Not sure what I'll replace it with.
Some Lessons Learned
Plan before you do - Draw a complete schematic of your new system and have knowledgeable people look at it and listen to their feedback. Take your schematic to your boat and walk through each wire, where it goes, can it be supported, how will you get it there, can it be run there, why run it there, what do you do if you can’t run it there? Example - my original plan to run 1AWG cable from the battery compartment under the floor and engine compartment to under the aft cabin didn’t work. Because I thought through an alternative I lost no appreciable time or money.
Serviceability and Functionality – Don’t build a car around the antenna or locate something because it looks good there. Locate it where it can do what it is intended to do well and is serviceable. If something fails can you service it in a panic, in the dark easily? For example don’t put an in-line fuse holder where you can’t grip it to pull it apart to check or replace the fuse.
Considerations – Beware of heat, the risk of acid leaks, standing water, and sharp edges. They can damage the wire/cable. The wires want to twist together. Avoid knots and kinks while you’re pulling wire/cable. Keep the wire and cables running parallel in the bundle.
Take nothing for granted – Check everything whether it’s part of the project or not. If your boat is like mine, you’ll be surprised at what you find. Lightly tug on adjacent wiring to make sure it is secure. If not, or especially if corroded, fix or replace them now while you’re in there.
Heat Shrink Tubing - Cut heat shrink tubing the length needed and slip on to the cable before crimping on the lug, ring terminal, or butt connector. The adhesive lined heat shrink tubing won’t always fit over a crimped lug, terminal, or butt connector.
Labels – To protect labels and wire/cable numbers use clear heat shrink tubing without adhesive lining. Keep the name short and install it on the cable and oriented so you can read when it is installed. I only “to and from” labeled the 6 AWG and above cables. However, all wires and cables are numbered with the wire or cable ID number to match the schematic.
Crimping - Put the lug or ring terminal on the stripped wire you are going to install and orient it to match what you will be connecting to before crimping. For cables 8 AWG and above I marked a line across the lug and cable jacket with a sharpie so I had an indicator to align to before crimping. When ready to crimp align the line on the lug with the line on the cable. The heat shrink will cover it up.
Shop before you buy – Fortunately my broker gets me discounts at West Marine, so I saved about 25% off the listed price. If I were to do this again, I would purchase the SmartGauge, battery charger, and battery monitor from Compass Marine (Maine Sail) whose prices are comparable.
Common screw – The most common screw I used was a ½” long, stainless steel #8 pan head phillips.
First Aid – Have lots of Band-Aides and antiseptic/Bactine. I looked like a cat had gone to town on my hands and forearms, and the inside of the boat looked like a busy MASH Unit.
Final Note – Folks that do this for a living earn every penny they charge. GOOD LUCK!
Schematic, Wire Detail, Voltage Drop
I've attached a copy of the cable planner in both an Excel and PDF format.
The cable planner contains:
- A copy of the schematic.
- The details for each wire/cable used in the schematic, including ID# to match the schematic, gauge size, wire/cable length, color, terminals, voltage drop.
- Voltage drop calculations. All are formula driven, but at the end of the day they are best estimates only.
File:Cable Planner 7-31-16 rev H4.xlsx
File:Cable Planner pdf 7-31-16 rev H4.pdf
To help in comparing the schematic to the wire details, a PDF containing only the schematic is attached.
File:Schematic 4-15-16 rev H4.pdf
Parts Used
I've attached a copy of the parts list in both an Excel and PDF format. The parts list contains the part name and number, the store or website I purchased it from, and the part number from that store or website. This is provided as a reference only, there are lots of choices out there.
CAUTION - The wire lengths provided are for my design and the wire/cable run choices I made. They are provided as a reference only. Your lengths may differ, measure for your application. The same is true for the cable lugs, ring terminals, and butt connector quantities. I was building up my on hand stock as well as provisioning for this project. Your quantities and terminal type and size may differ. Check your application.
File:Replacement Parts Tech Writeup 03-25-16.xlsx
File:Replacement Parts Tech Writeup 03-26-16.pdf
PDF of This Write-Up
I've attached a copy of this complete write-up in PDF format for reference. All links have been removed.
