Changing Engine Mounts
By Ron Hill, Apache #788
Changing engine mounts is an easy task to do. I did it by myself in about four hours. With two people, you can easily cut that time in half. I had already removed the bronze drive shaft and was changing it with a stainless shaft so that piece was already disconnected from the engine. At the same time, I was in the process of replacing the Aqua Lift muffler so the exhaust riser going into the single hump hose was also disconnected. With those two items disconnected, I figured there wasn't a better time to tackle the engine mounts. ALL other hoses and wires remained connected.
I removed all four top engine mount nuts and made a template gauge of the distance between the bottom of each engine mount bracket and the engine bed. This allowed me to install the new mounts and have them adjusted so they'd be in the ballpark for later checking shaft alignment.
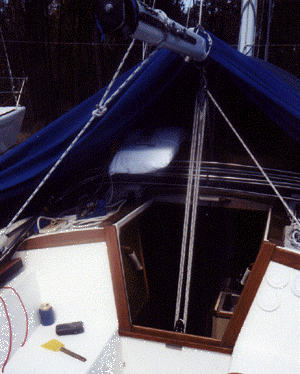
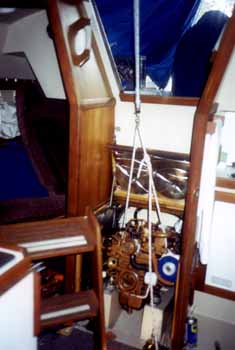
I rigged a 4:1 block and tackle to the aft bail on the boom. The engine and transmission (M25XPA) weighs 309 lbs. Even though I was only lifting half that weight, I wanted to insure I wouldn't put a bow in the boom. I took the main halyard and secured it taught around the boom just aft of the "lifting" bale. The end of the block and tackle was led through the starboard genoa block to the primary winch. To keep the boom centered, I ran another line from the boom to the port side primary winch.
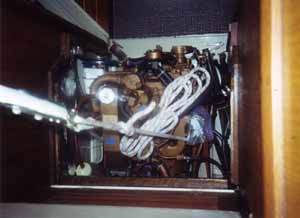
I decided not to use the two lifting eyes on the engine as they are off set and I wanted the engine to rotate straight up, not cocked to one side. I made a lifting bridle (7/16" Dacron) around the forward part of the engine. As the engine lifted up it rotated back on the rear mounts, holding it in place. When it was raised high enough, it was an easy matter to remove the old mounts and slip the new ones in place. There was sufficient room for the exhaust riser (still attached to the engine) to rotate freely. After lowering the engine, I moved the bridle to the rear of the engine. I lifted it again with the new front mounts keeping the engine in place while I changed the rear mounts. Both times I threaded the top nuts a few turns (on the "keeper mounts") as a just in case.
The hardest part of doing this by yourself is going from the cockpit to the inside without steps or an engine to step on. Would you believe that I swung down on the spinnaker halyard like Tarzan and got back up by a hand over hand climb!?! It's much easier to climb in/out of the V-berth hatch. That's why it's helpful to have a second person below telling the one in the cockpit on the winch, what's happening.
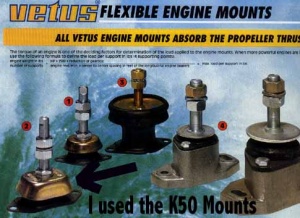
I used Vetus K50 mounts, which are similar to the new style Universal mounts. (The same mounts will work on the M25 Universal.)
Here are a few tips for an easy engine mount change out
- Make sure the new mount is rated for the engine weight (with transmission) and horsepower.
- Measure the vertical distance between the engine mount brackets and bed insuring there is sufficient room to accommodate the minimum height of the new mounts you select.
- The most difficult engine lag bolt to remove was the forward bolt on the port rear mount. I purchased a 9/16" box/open end wrench and cut it in half so I had a "stubby" wrench to work with.
- Check the length of the lag bolts needed to secure the new mounts. Mine needed bolts 1/2" shorter than the original.
- If some of the old lag bolt holes are too large, you can use a longer bolt or paint the holes with glass or fast drying epoxy. DON'T fill the hole, as you won't be able to drill it out!
- Use pieces of leather or chafe guard to protect your lifting bridle.
- Place your bridle on the EDGES of where the oil pan joins the engine and make sure you are not pinching any wires or hoses.
- Ensure that the mounts you purchase have mounting holes that match (length fore and aft) the existing holes.
- Look at your existing mounts and note where in the elongated slot the bolt is mounted. I had to do a little "rat-tail file" work to elongate that hole in a couple of my mounts.
Although I replaced my mounts while the boat was on the hard for winter storage, there is no reason you couldn't do it in the water. Just remove the four bolts holding the flanges together and slide the drive shaft aft a couple of inches. Removing the riser to muffler inlet hose is tougher if you don't have a hump hose, but still doable. Maybe this is a good time to install and treat your engine to a single hump hose. I found that both of my old port-side mounts were absolutely shot (both were oil soaked)!
I can't say enough about the new mounts. It's like I'm on a different boat!! There is no RPM that is smoother than another (above low idle). The buzz in your feet behind the wheel from a long motor and the vibration in the galley floor are GONE. The loudest noise now is the "sploosh, sploosh" of the exhaust water. I received the best compliment ever from another C34 Fleet 12 member. He was getting ready to untie my starboard lines when he asked, "Aren't you going to start your engine?" It was already running at 1200 RPM!! Since I wrote this article I've had two more incidents where marina personnel have asked the same question, and the engine is already running!!
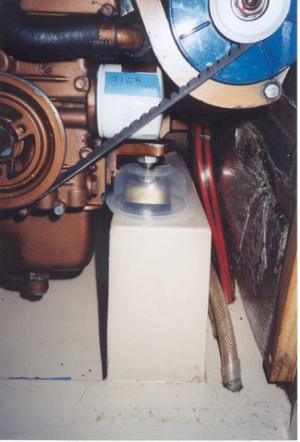
A Simple Engine Mount Oil Protector
I use a throw-away container to cover the fwd port engine mount. It's so easy to spill some oil while changing oil filters. Oil on the rubber of an engine mount just eats up the mount. I usually tape the container down and cover the top with a rolled up paper towel. For picture purposes all the extras are off so you can see the container.
I use masking tape with engine hour to tell me when the last time filters, zincs, etc. have been changed. Note the red slippage mark in the alternator retaining nut.
