Cabin Heater
By Bob Kuba, Quiet Island #1291 (1994)
Why this system?
When we first purchased this boat, it was located in Cleveland, Ohio. And I live in Chicago. I had my heart set on sailing it back home. Across western Lake Erie, up the Detroit River, across Lake St. Clair, up the St. Clair River, Northward up the length of Lake Huron, through the Straits of Mackinac into Lake Michigan, and then down the entire length of Lake Michigan to Chicago. A journey of about 732 miles. The only problem was, my window of opportunity was at the last two weeks of May. And around these parts, the weather is typically cold (40ish), windy and rainy. We were going to need some type of heat while underway, to make it somewhat enjoyable. Even though it meant that we would have to motor-sail at times, we needed the option of warming up. I looked at diesel fuel units, and actually liked them better because you didn’t have to run the engine, but I didn’t have the time to install a more complicated system. All in all, I’m happy with it, and so is my crew.
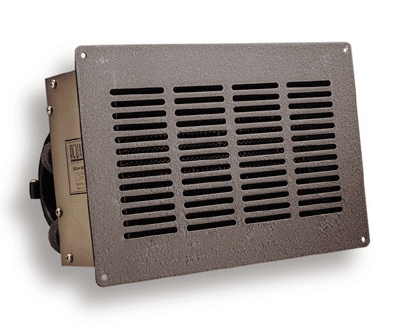
The unit was purchased from West Marine for about $160.00 (~2002). It’s a self-contained package composed of a small radiator with an inlet and an outlet from the engine, and a three-speed 12v blower motor. There were two sizes available, and I choose the smaller, which was a good fit for the installation, and it puts out plenty of heat, even on the low blower setting.. It has a small radiator attached to a 3-speed fan (Off-Low-High) and a black or white grille for the exterior mounting. The concept is the same as the heater in your vechicle, using hot water from the engine as a heat source.
The three speed cabin heater Model 5H is also available from HeaterCraft.
| Unit height - 6.4" | Unit width - 9.4" | Unit depth - 8.66" | Grill height - 7.45" |
| Amp low - 4.9 | Amp med - 6.6 | Amp high - 9.6 | Airflow low - 172 cfm |
| Airflow high - 263 cfm | Max. Est. BTU/h - 28000 | Weight - 7.02 lbs. | Hose Barb - 5/8" or 3/4" |
| Optional low amp fan | 24V DC fan optional | Black or White grill | Flush mount |
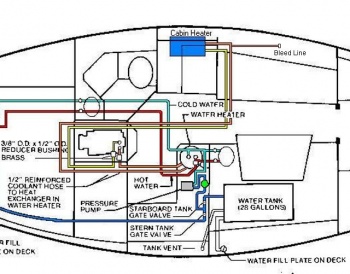
PlumbingThe unit was installed in series with the boat’s hot water tank line using 5/8” hi-temperature heater hose. The easiest place to tap into the hot water line was behind the engine, where the original hose made the turn to go towards the hot water heater located under the sink. Here you have a place where there's room to work, and can cap the lines immediately, with little or no fluid (antifreeze) loss. Only one of the hot water lines had to be cut, and it really doesn’t matter which one. Your direction of water flow will either be:
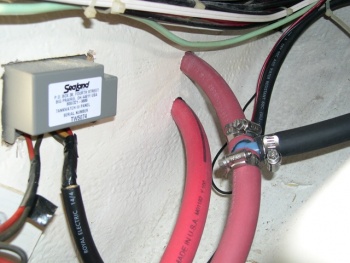
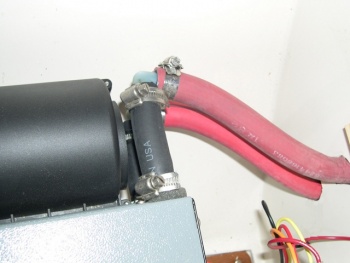
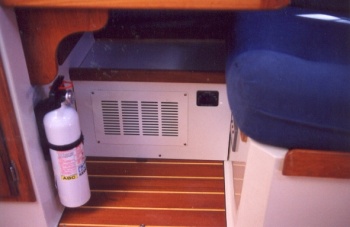
So, at the rear starboard side of the engine, I spliced into the water line that was going to the hot water heater. The two additional 15 ft. lengths of heater hose ran around the back of the engine, and then along the port side up to the compartment that contains the holding tank, where they enter the compartment from below. Two 1 ¼” holes will have to be drilled through the aft wall of the holding tank compartment under the nav station. This allows the heater hose to be routed to the heater installation area under the nav station, and attached to the inlet port on the radiator. This photo looks at the aft bulkhead in the holding tank compartment. It's important to bleed the system to ensure there is no trapped air anywhere in the system. The black water line you see in the picture is there to provide a "high point" in the system where I added replacement anti-freeze to top off the system and to make sure there was no trapped air. The black "t-eed" line going off to the right is a section of hose that is capped off at the other end. The purpose here is to stand this hose straight up and create a "high point" in the system to make it easier to bleed all the air out. The return line attaches to the outlet port of the radiator, and runs back alongside the other heater hose back to the rear of the engine compartment, where it is attached to the other end of the line you cut. From here it uses the existing hose that goes to the hot water heater, and then flows back to the engine pump, where the circuit begins again. Now, you need to get all the air out of the system. After all, two 15 ft. lengths of empty heater hose, not to mention, the radiator on the heater itself, which was empty, have been added to the system. The procedure is simple. All you need is point in the system that is at a higher elevation than everything else, including the engine. So I installed a tee in the line that fed into the heater unit, and attached a 5 foot length of heater hose that I could cap off. Once the system is intact, and all clamps tight, uncap this line. Then hold it up high, and using a funnel, fill the entire system from this point, letting the air bubble up and out the hose. Taking the radiator cap off the engine also helps trapped air escape. Start the engine, and after a few minutes, check the level again, and repeat until the level at the radiator cap stayed consistent. Then filled the reservoir overflow tank to the proper level, and you're finished. I mounted the unit under the nav station, and it draws fresh air for the blower from an area at the top rear of the cabinet that I built for it. I chose this location to avoid drawing air from the sometimes smelly bilge area. I also considered the area forward of the water tank, under the settee on the starboard side, but I didn't want to draw any intake air from the bilge area and blow those aromas all around the cabin. Plus, I didn't want to give up any of my storge areas. I installed a teak lip on the top of the cabinet to create a handy storage shelf, that otherwise would have been wasted space.
PerformanceThe heater works like a charm when motoring. When we brought the boat from Cleveland to Chicago in the early spring, The outside air temp was in the 40's, but the heater kept the cabin at a luxurious 80 degrees! And it provided a place to shake off that bone-chilling cold! In the summer, very little heat is even noticeable coming from the unit. And the extra run of heater line reduces the temp at the faucets a few degrees from blistering hot, to just scalding hot. I was afraid it would take even longer to heat up the hot water, but it really isn't noticeable, compared to the benefits of having a place to get warm while underway. A warm crew is a happy crew! If you keep the crew (Admiral) happy, you can spend even more time on the boat.
Notes from two years later...I've had this installation for 2 years, and been through through some hot, humid 100+ days, and it hasn't really added any additional heat to the cabin. Even though hot water is flowing through the heater core, very little is dissipated into the cabin. In fact, to gives you some basis for comparison, it radiates less heat than the hot water heater. Not enough to be noticeable. FAQQ. Is the unit wired to a thermostat? A. The fan is wired to a 3 position switch, Off, Low, and High, which was included in the purchase package. I didn't see the need for a thermostat, since it really wasn't designed to be a "furnace". I use it as a source of supplemental heat to take the chill off while under way. Q. Doesn't the hot water that continously flows through the heater core make the cabin too warm on summer days? A. No, it doesn't get as warm as the hot water tank does. |
