Slow or Difficult to Start Universal M-25XP Engine
By Mike Vaccaro, Spirit #563 (1988)
Also see this Message Board discussion: [1]
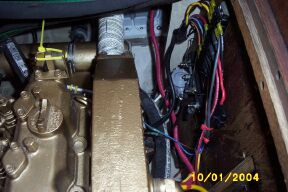
Various versions of the Catalina 30, 34 and 36 are equipped with the Universal M-25XP 23 HP engine. Our boat is a 1988 Catalina 34, Hull number 563. We purchased it in the Spring of 2003, and have had a “slow” starter since we brought her home. When the weather in the Florida Panhandle got cold (by Florida standards!), the slow starter wouldn’t cut it—even when using the recommended cold starting procedure in the Universal Owner’s Manual. As we repaired our boat we learned a couple of valuable lessons along the way that are applicable to all Catalina’s equipped with this engine.
The first lesson is that the stock system is adequate, provided a good ground and solid connections exist. The root of many electrical gremlins is a poor ground, so if your starter is slow to turn over, the simplest fix is to clean the ground connections and check/replace old, corroded cable lugs. The best way to ensure a proper, mechanically sound connection is to “crimp for strength” and “solder for juice,” finishing all connections with a quality, glue-lined shrink-wrap. A properly crimped, soldered and sealed connection with marine-grade materials should last for a decade or more if properly maintained. An unsealed crimp connector on plain copper wire will begin to corrode as soon as it’s installed. An occasional spray with Boeing’s T-9 or a similar product goes a long way to maintaining sound connections.
If cleaning/repairing the connections doesn’t do the trick, the next step is to either pull the starter and clean/repair as necessary or address the wiring. The most inexpensive option is to remove the starter and “rebuild” it yourself. In all likelihood, the only problems with most of our starters is not mechanical or even wear, but surface corrosion on the armature, commutator and field coil “brushes.” This type of corrosion is easily removed with a good cleaning and fine grade sandpaper. If your starter is well-used, you might also consider having a set of commutator brushes on hand, since those are likely the only parts to wear out. In addition to 400-600 grit paper and engine cleaner (Gunk or equivalent), you’ll need a couple of simple hand tools, some grease and a couple hours of time to give your starter a new lease on life.
How The Starter Works. The starter is designed for brief, infrequent use. As a rule of thumb, never crank a starter more than 15 seconds (even during maintenance). The Universal manual recommends 10 seconds, with 10 seconds cool-down between engagements with no more than 30 seconds total cranking. Also note that if the seacock is open, cranking the starter will fill the waterlift muffler. If you crank more than 30 seconds, you’ll fill the muffler and water will start to backflow into the exhaust riser. If this water finds it’s way back into the engine, you’ve got a much larger repair job on your hands! This is why the muffler MUST be drained after 30 seconds of cumulative cranking. There is a small plug or petcock for this purpose that can be accessed under the head sink. Opening the petcock, allows the water in the muffler to drain into the bilge.
The starter on the Universal M-25 series engine is the “pre-engaged” type. To quote Nigel Calder, “When the solenoid is energized, the electromagnet pulls a lever, which pushes the starter-motor pinion into the engagement with the engine flywheel; the main solenoid points no close, allowing current to flow to the motor, which spins at full speed and…starts the engine” (Calder, Boatowner’s Mechanical and Electrical Manual, Second Edition, 1996, p. 220).
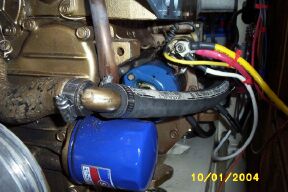
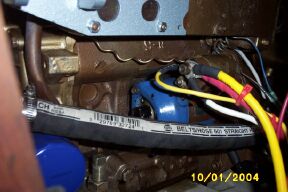
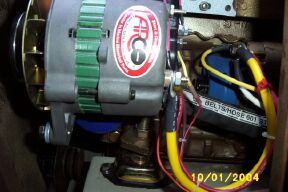
Starter Removal. Disconnect the battery from the starting system. Ensure that there is no juice at the positive lead of the starter solenoid! Remove the alternator and wires from the starter solenoid. It is NOT necessary to remove the alternator bracket or oil filter to remove the starter. If you are going to re-use existing wiring, label all of the wires carefully, or have a schematic on-hand to aid in reassembly. A dead short across the solenoid or alternator can destroy the alternator diodes (or worse!) in short order. The starter solenoid has three terminals; two screw posts (studs) and a spade fitting. Since the starter is Japanese, the bolts on the studs are metric (mine required a 12mm socket). The primary stud is the DC positive input from the battery. Your boat may also have additional DC wires attached at this point (e.g., DC power for the engine control panel). The alternator positive output is also connected to this stud. The second stud has a braided wire that provides DC power to the commutator brushes. The spade fitting is the “control circuit” for the solenoid—it is connected to the ignition switch and engages the starter when the key is turned or start button is pressed.
The starter is bolted to the crankcase with two bolts. You can access these metric bolts (my bolts had 13mm heads) with a ratchet and suitable extensions. After the bolts are out, the starter may be pulled out. If your starter has been installed for a while, a gentle rocking motion will “break” it away from the back of the crankcase. Also note that if your system is not stock, many mechanics will ground the starting battery directly to a starter mounting bolt, so you may have a heavy-gauge negative cable attached directly to your starter (this technique is most often used when a dedicated starting battery is installed).
Starter Rebuild/Cleaning. In reality, all we are talking about is disassembly, cleaning, and greasing the starter. The most common “rebuild” is simply replacing the commutator brushes. The first step is to remove the two small screws that hold the grease cap in place on the back end of the starter (the “front” end has the gears that engage the flywheel). Once the cap is off, you’ll see a semi-circular slip ring that locks the end housing. After slipping this off, it’s simple a matter of unscrewing everything an disassembling. Be careful when removing the thin rubber linkage seal on the solenoid since it can be easily torn. Make a few notes to aid in reassembly. The only non-obvious thing to do is to pop the back end of the starter casing off (this is the end with the brushes and grease cap). You’ll see a seam, and after you’ve got everything else disassembled, tap the joint with a hammer and screwdriver or chisel to pop the end off. Be careful not to damage the cap! After the cap is off, you’ll note that the brush assembly can also be removed. Use caution not to damage this assembly or the braided wire that connects it to the solenoid. Check the condition of the brushes. If excessive wear is evident, replace as required. Our engine had 575 hours on it, and the brushes were fine.
Clean all of the parts with Gunk or an equivalent product in accordance with the manufacturer’s instructions. I rinsed everything in water and gave a quick blast with compressed air to dry. If you don’t have access to compressed air, wipe and drip dry as required. The armature and commutator should be cleaned with fine grit paper—these are segmented metal portions of the main rotor. If the corrosion is significant, there may be some pitting. The goal is to remove the surface corrosion. The inside of the main case is the field coil. It has four large, concave “plates” (brushes). Remove the surface corrosion from these plates with fine grit paper as well.
Reassembly. Putting everything back together is fairly straightforward. Ensure that you use good quality marine grade grease, and be generous with your application (grease is cheap, corrosion is expensive). Coat all the internal parts of the starter with Boeing T-9 to aid in preventing corrosion. Ray Erps provided the following advice in a post the Catalina 34 website, in accordance with one of the techniques offered by Calder, to reinstall the brushes: “…push the brushes up against the spring and force the brushes into a cockeyed position that binds them in their...holders. Once you slide the armature/rotor assembly in, you can give the brushes a little prod and they’ll pop back into position.”
Bench Check. Prior to reinstalling the starter, you should bench check it. Secure the starter since it’ll produce quite a bit of torque when it runs. A bench vice works well for this. You’ll need a 12-volt power supply capable of supplying the required (high) amperage, either a battery or “emergency starter” are probably the most readily available sources of power. You can even use the battery in your car with jumper cables, if it’s handy. Run the negative cable to the starter housing and the positive lead to the positive terminal on the solenoid. You can make a small-gauge jumper out of any wire you may have lying around. Touch the jumper to the positive stud and the spade stud on the solenoid—it should spin like crazy! A couple of quick spins will distribute the grease and give you a warm fuzzy that your starter has a new lease on life.
Reinstall the starter on the engine and reconnect the wires. Whenever you attach bolts to solenoids, use caution to always use self-locking hardware (having a positive wire vibrate lose and ground on the engine block would cause a dead short that could destroy your battery bank in short order if it’s not protected by a fused circuit) as well as not over-torquing, since most posts are made out of copper or brass. You can momentarily engage the starter to check it prior to replacing the alternator. If the engine fires, do not allow it to run since the water pump will not run without the alternator belt!
If everything works well at this point, you’re all set, otherwise it’s time to deal with the wiring. Chances are that reestablishing good ground removing corrosion from the starter will do the trick, since you’ve now restored the system to a condition similar to when the boat left the factory—in other words, it should work. If you chose to modify and/or improve the primary wiring harness, you’ll have to do some extra research since many options exist.
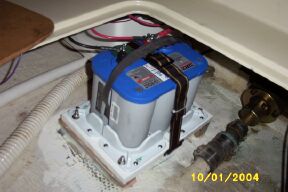
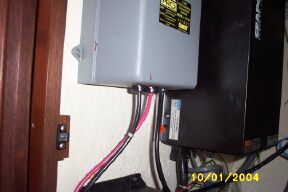
In addition to rebuilding the starter, we also moved the starting battery to a position immediately aft of the engine and replaced ALL wiring with appropriately sized marine-grade cable. In addition, we added a solenoid-controlled glow plug circuit. The result of all of the modifications is an engine that starts cold with 5-10 seconds of glow plug and less than 2 seconds of cranking. Although it’s an auxiliary, there’s no reason that the engine in a sailboat shouldn’t start every time you turn the key or hit the button!
