Galley Sink Cover
Contents
Weal Sea's Sink Cover - Cutting Board Combo
By Dan Harrington, Weal Sea #1289
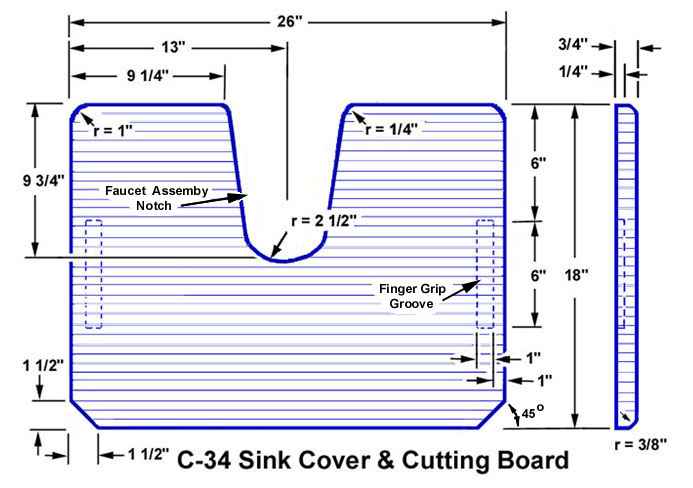
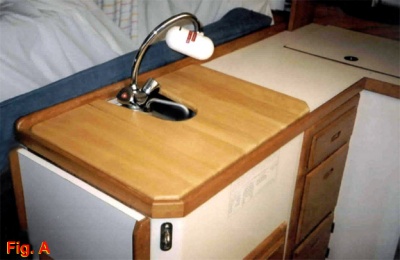
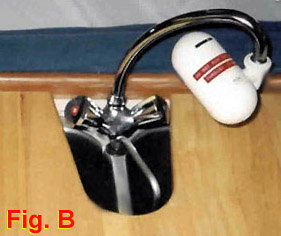
Need more counter space in the galley and maybe even a cutting board? The photos and the drawing shown here illustrate a galley project adapted from our kitchen at home... a combination "sink cover-cutting board" designed so as to allow continued use of the sink to wash-out tumblers, discard liquids, etc. even when the sink is covered. (Also hides dirty dishes in a pinch!) Because the board can be flipped, one side is kept "neat" for display while the other side can be "used and abused" for cutting, etc.
Materials:
You'll need a piece of solid hardwood measuring 18" x 26" x 3/4" (see drawing, but also see "cautionary note" below). Because I was unable to find a hardwood "butcher block" cutting board that fit the above measurements, I ended up fabricating my own board.
I purchased two collapsible solid hardwood "TV snack tables" from Wal-Mart for about $10 each. These are normally sold in sets of 4 with a holding rack but can often be purchased as singles. The tops of these particular tables measured 21"x 15"x 3/4".

Board Fabrication:
- Remove and discarded the TV snack table legs.
- Using a table saw, square the edge on one side of each tabletop by cutting a 1/2" strip off one of its longest (21-inch) sides.
- Using a biscuit jointer, cut 3 or 4 biscuit grooves in the squared edge of each tabletop. (Tongue-and-groove methods can also be used to join the 2 tabletops together).
- Apply wood glue to the squared edges, insert wood biscuits, and then clamp the two tabletops together.
- Allow the newly fabricated 29"x 21"x 3/4" board to dry completely (24-48 hours).
- Sand surfaces to remove glue remnants and smooth the junction of the joined tabletops. (NOTE - You'll "finish sand" later.)
Cutting and Finishing:
Cautionary Note:
Measurements given here are for my boat, a 1994 Mk I C-34. While the galley counter top and sink measurements of the MK I's appear standard, the timeworn woodworker's adage "measure twice and cut once" still has merit. Therefore, you should use the measurements in the drawing shown here to make a full-sized cardboard pattern of the project that you can test-fit on your boat. Since the board is designed to be flipped, don't forget to "flip" the pattern to test-fit both sides.
Acknowledgment:
Many thanks to Ben Holland, a fellow C-34 owner and professional furniture craftsman for helping with this and other projects.
Alternate methods
Galley Sink Covers The C34 is very short on counter space in the galley. To compensate, I purchased a 12x32x1/2 piece of white polyboard (similar to what cutting boards are made of) for $20. I cut it to fit both sinks (two pieces). At the aft inboard corner of each piece (as looked at while standing at the sink) I cut a one inch hole as a finger hole in order to lift the boards up and out. It works great and adds plenty of counter space. In fact, we usually leave one cover in place all the time. Lou Berman, Second Wind #1366 (1997)
Another Idea is to purchase two smaller wooden cutting boards. We purchased ours at Bed Bath and Beyond for I think $8 each. Using a sabre saw I made cut-outs to fit around the faucet. Ken Juul, Luna Loca #1090

