Freedom 20 Inverter Installation: Two (Similar) Approaches
Freedom 20 Inverter Installation: Two (Similar) Approaches
By Capt. Al, Kindred Spirit #55
I installed the Freedom 10 basically for the battery charger at the dock. Since then we have gone on two trips, one for three days and one for five days. We love our coffee and have tried many ways of making it. Now with the inverter we are back to the old style 110v brewed coffee. We figured that the first pot cost $700 to brew and by now our 8th pot we have broken the $100 per pot mark. Maybe by next summer we can be down to the same as Dunkin Donuts $1.18 per cup.
Where did I put it?
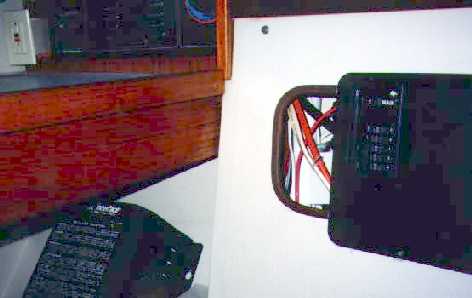
I purchased two 6 foot #8 110v cords for the rear and wired it to the inverter. Don't forget the ground wire and the plug for your monotor. They all go in the rear of the inverter. With all wires hanging from the inverter I mounted it to the wall with four ss screws and washers. I then bent all wires 90 degrees and drilled four 3/4 inch holes into the holding tank wall, keeping everything as close to the inverter as possible. From the holding tank area it was easy to snake the 110v wires to the fuse panel. The two battery cables I snaked under the floor and up next to the water heater. They would not reach the battery, which was ok, because, on the water heater wall that backs up to the battery box I mounted a 200 amp fuse and a new cable to the battery from there. The black ground wire had to be extended by purchasing a connection post to continue on with a new piece of cable. As for the cable, I am not a purest, so I went to my local auto store and bought #2 welding cable (bends much easier). All my battery cables will, as I get time, be replaced with this #2 cable. Check the price locally, if you need 60 feet, it adds up. I bought copper ends, pretended that I was a plumber and soldered them on all the wires, hammered them somewhat flat to check the solder and made a heavy imprint with a nail set (actually I used a Philips screw driver end). I wanted to make sure that they all were tight. Finish up with red and black shrink tubing to color code.
I did run into a problem with the 110v line from the dock side plug entrance. It seems that on my boat they ran all the green and white wires to a terminal block and only the black to the on/off switch. The inverter calls for the incoming line to go directly to it. YOU MUST TRACE THIS LINE AND DISCONNECT IT FROM THE TERMINAL BLOCKS. It must go to the inverter and then return from inverter to terminal and switch. It would not be a bad idea to run a non spliced wire from the inverter to the dock side plug socket...figure about 18 feet of wire. This will be a rainy day future project for me. For now I bought a plastic junction box with cover and made this connection. As installed I can lean over the chart table cushion and see the top of the inverter with its fuses and switch. It may seem that it is noticeable but it is NOT.
I still get a thrill showing people that at anchor I can light the 110v table lamp. Hey this is a new concept for us...along with the engine heated hot water...never had these items before. Al and Michele #55 "Kindred Spirit"
#2: More Thoughts on the Installation
By Gerald Misener
The following describes a Freedom 20, 2000 watt inverter installation, mounted under the nav station. It is connected to two 8D gelcell batteries located under the starboard settee which I converted to a battery compartment after removing the existing water tank. To make the connection I used the recommended 2-0 cable which I had made up at a local battery shop and I purchased the 300 amp fuse for safety. The fuse is mounted on the inside wall of the combination settee/nav seat. Being located there, it is easy to string the wires from the Freedom-20 back through the power panel compartment and down behind the settee to the fuse. The 2-0 wires from the batteries are taken to a battery switch mounted on the aisle side of the old battery box (just in front of the sink/water heater area). Two cables (+ & -) are then brought out the bottom of the battery box/settee to the same area via the bilge.
For backup, I also added a battery and fiberglassed shelf behind the engine next to the muffler to hold an additional Group 24 gelcell battery. This is my emergency starting battery and is hooked to the #2 side of the battery selector switch in the nav station. The other battery Switch wires are connected to the #1 position.
When I use heavy loads like a microwave (mounted under the sink) or a toaster (what a luxury!) I tend to run the engine with it's 124 amp Ample alternator. I do not like to discharge the batteries below the 50% mark. I like the gelcells as I do not have to equalize them like the wet cells.
