Difference between revisions of "Flexible Coupling"
| Line 1: | Line 1: | ||
| − | Flexible Coupling Installation | + | '''Flexible Coupling Installation''' |
"Soft" engine mounts (that are designed to isolate engine vibration from the hull) and a flexible coupling go a long way to minimizing vibration. This article details some things I learned installing a Vetus Bullflex 2 flexible coupling in our 1988 Catalina 34, Hull 563 equipped with a Universal M-25XP engine. In addition to the coupling, we replaced the stock engine mounts with [[Engine_Mounts|Vetus K-50 mounts]]. There has been quite a bit written about changing mounts and engine alignment, so I’ll just discuss the installation of the flexible coupling. This installation technique assumes that you’ll keep the boat in the water. If you pull the boat, installation is somewhat simplified, since you can pull the shaft to aid in disassembly. | "Soft" engine mounts (that are designed to isolate engine vibration from the hull) and a flexible coupling go a long way to minimizing vibration. This article details some things I learned installing a Vetus Bullflex 2 flexible coupling in our 1988 Catalina 34, Hull 563 equipped with a Universal M-25XP engine. In addition to the coupling, we replaced the stock engine mounts with [[Engine_Mounts|Vetus K-50 mounts]]. There has been quite a bit written about changing mounts and engine alignment, so I’ll just discuss the installation of the flexible coupling. This installation technique assumes that you’ll keep the boat in the water. If you pull the boat, installation is somewhat simplified, since you can pull the shaft to aid in disassembly. | ||
Revision as of 03:09, 29 March 2008
Flexible Coupling Installation
"Soft" engine mounts (that are designed to isolate engine vibration from the hull) and a flexible coupling go a long way to minimizing vibration. This article details some things I learned installing a Vetus Bullflex 2 flexible coupling in our 1988 Catalina 34, Hull 563 equipped with a Universal M-25XP engine. In addition to the coupling, we replaced the stock engine mounts with Vetus K-50 mounts. There has been quite a bit written about changing mounts and engine alignment, so I’ll just discuss the installation of the flexible coupling. This installation technique assumes that you’ll keep the boat in the water. If you pull the boat, installation is somewhat simplified, since you can pull the shaft to aid in disassembly.
The first step in installing the coupling is to remove the old coupling. This is much easier said than done, especially if there is any dissimilar metal corrosion (the stock shaft is keyed bronze inside hardened steel). After several years in a corrosive salt water environment, couplings tend to effectively fuse themselves to the prop shaft. The good news is that if you have a stock coupling, on a stock shaft, it’s practical to cut the shaft at the aft face of the coupling, since the Bullflex has an elongated compression throat that attaches to the shaft.
Figure 1. Bullflex coupling.
The shaft slides into the compression sleeve on the left portion of the coupling shown in Figure 1 (shaft diameter equals dimension P). Four Allen screws serve to compress the sleeve around the shaft. There is not a traditional key for securing the shaft in the coupling.
The first step is to loosen the nuts that hold the old coupling to aft portion of transmission. If your coupling has been neglected, you might consider spraying a good bit of penetrating oil on it and all fasteners and allowing it to sit for a day or so prior to attempting removal. You can access the nuts that attach the coupling to transmission with a box end wrench, or better yet a box end ratchet. If you plan to cut the shaft, it’s not necessary to remove the lock nuts or safety wire.
The overall length of the Bullflex (dimension L in Figure 1) is quite a bit longer than the stock coupling. The stock coupling is about the dimension of the Bullflex, minus the compression sleeve. So if you cut the stock shaft and don’t slide it at all, it will end up just about filling the compression sleeve in the Bullflex, which is perfect.
Note that if you don’t cut the shaft, you may not be able to slide it aft far enough for installation in the Bullflex without lifting the engine out of the way. Ideally, there should be about 1 inch of clearance between the rudder and the prop. It’s best to take a quick trip over the side to eyeball the clearance; but before you loosen the old coupling, make a mark on the shaft where it enters the packing gland for reference. After you loosen the coupling nuts, you can slide the shaft aft until it hits the rudder to check the clearance. When I installed the coupling in our boat, I was careful to ensure that the final assembly kept the mark I made adjacent to the packing nut prior to disassembly, as I wanted my prop to stay in the same position relative to the rudder.
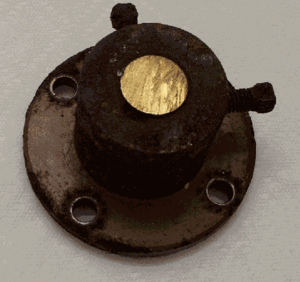
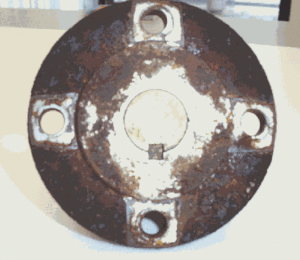
Cutting the shaft in the boat can be done a number of ways. Probably the quickest is to use some sort of cut-off tool. A hand-held hacksaw blade will also work, and odds are you won’t cut or damage anything you don’t intend to. The shaft in Figure 2 was cut by hand with a hacksaw blade. The aft face of the old coupling will serve to square the blade to the shaft, which will make finishing with a file that much easier. The end of the shaft can be finished with a file, and the shaft cleaned with 220 grit paper and machine oil. Figure 3 is the end of the stock shaft (with key) on the front face of the coupling—the side that bolts to the transmission.
Once the shaft is cut, remove the nuts and the old coupling. Before installing the new coupling, you might consider replacing the packing or even replacing the packing nut with a dripless shaft seal, since you can slide the nut or seal over the shaft. Measure carefully to determine if you have sufficient shaft length to add both the flexible coupling and the dripless seal.
Since the packing nut is easily accessed with the stub shaft exposed, might as well change the stuffing, if it’s been a while. If you’re changing the stuffing in the water, have an old cotton rag strip handy. Once you pop off the stuffing nut, wrap the cotton tightly around the shaft and secure it with a zip tie or hose clamp. This will reduce leaking to a slow drip while you’re working. You can slip the nut off the stub shaft and clean it out. If there is any shaft wear, you might consider sliding the shaft in or out to put "new" shaft in the nut and cutlass bearing. Best to take a quick dip overboard to check things out before you finalize shaft position. Another technique is to slide the shaft aft until the prop hits the rudder. Mark it, and then slide it forward about 1 inch (more is O.K., less isn’t!). Again, if a diving mask is handy, make sure your not doing something stupid! This falls under the purview of the time honored guidance to "measure twice, cut once…" Install the new packing and hand tighten the nut—you’ll need to retighten as the new packing seats in the nut.
Another technique I picked up from a local mechanic is to not bother with wrenches when working with stuffing glands. The packing nut itself should always be tightened by hand, and only the small lock nut merits more force—but not much! To loosen a lock-nut, I just tap the edge with a dull chisel and hammer, seating the chisel in such a manner that only the lock nut can turn. If there is any corrosion, a wire brush will clean things up before disassembly. When it’s time to tighten, I tighten the packing nut by hand, then turn the lock nut and give it another tap to lock it (only about a 1/16th to an 1/8th of a turn). With traditional Teflon stuffing, a good rule of thumb is to tighten the gland to the point where it won’t heat up to a point that you can’t hold on to the nut.
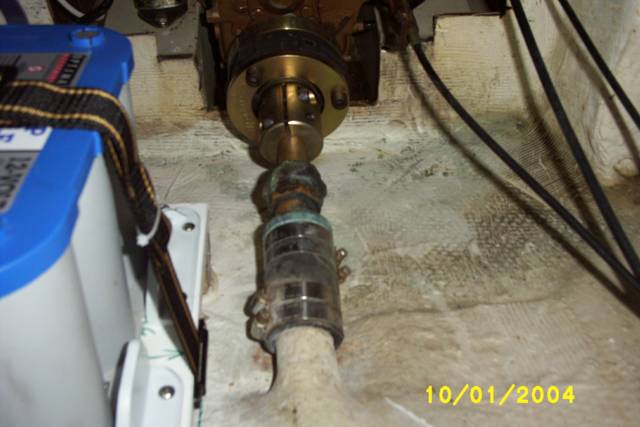
Figure 4. Bullflex 2 Flexible Coupling installed.
The Bullflex coupling comes with detailed installation drawings including torque specifications for all of the bolts. All of the hardware is metric. I had to go to a local auto parts store to find the appropriate metric Allen bit for the torque wrench. The bolts that compress the sleeve around the shaft have an Allen head. The lock nuts that attach the coupling to the transmission are low-profile nuts that can be seated with a metric box-end torque wrench. To attach the coupling to the shaft, slide the shaft so that it’s in it’s final position (nominally 1" desired between prop and rudder)—this can be the mark you made initially showing where the shaft exited the packing nut if you didn’t want to change anything. Then, holding the shaft in place, slide the coupling until it butts against the transmission flange. You can then tighten the compression sleeve. After this, the coupling will be firmly attached to the shaft, but you can still slide the shaft aft to assist in engine alignment and installing the mounting studs.
Before attaching the mounting studs to the coupling, you should re-align the engine. Not having the studs sticking out of the coupling makes it easy to turn the transmission and check the alignment. After the engine is properly aligned, you can slide the shaft aft and insert the studs. Although the coupling is, in effect, a type of "universal joint" and is designed to work with up to 3 degrees of misalignment, you should still strive to align the engine to within the standard .003 limits, since the coupling is only designed to turn at maximum RPM with no misalignment. The "universal" flexibility of the coupling should be used to damp vibration, not compensate for poor alignment.
When inserting the studs, you should use red Locktite in accordance with the installation instructions for the Bullflex coupling. To secure the studs, you can thread two metric nuts against each other to make a "bolt head" that can be tightened with a box end wrench. Another option is to use a metric cap nut. After the studs are installed, you can align them with the holes in the transmission coupling and slide the shaft into place and torque the lock nuts. Figure 4 shows the final installation. The tech support folks at Vetus recommend an occasional application of Boeing T-9 to prevent corrosion. They indicated that it won’t affect the rubber in the coupling.
Vetus maintains a website with extensive information, including installation drawings. When your order the coupling, be sure to order the hardware kit for installation, it includes all the studs and nuts required for mounting. The coupling is maintenance free once installed, save for the occasional spray of Boeing T-9 to minimize corrosion effects (the coupling is anodized, but the hardware is not). The Vetus tech rep I spoke with recommended this and stated that T-9 was safe for use on the rubber components of the coupling. As with any rubber in the engine compartment, use caution not to allow petroleum products to come in contact with it.
Mike Vaccaro Spirit '88 Hull 563


