Difference between revisions of "Replacing Sliding Doors"
Pablosgirl (talk | contribs) |
Mark Elkin (talk | contribs) |
||
| (3 intermediate revisions by one other user not shown) | |||
| Line 12: | Line 12: | ||
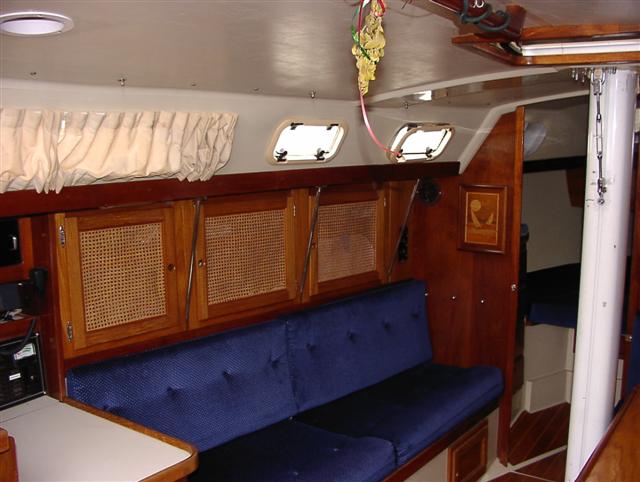
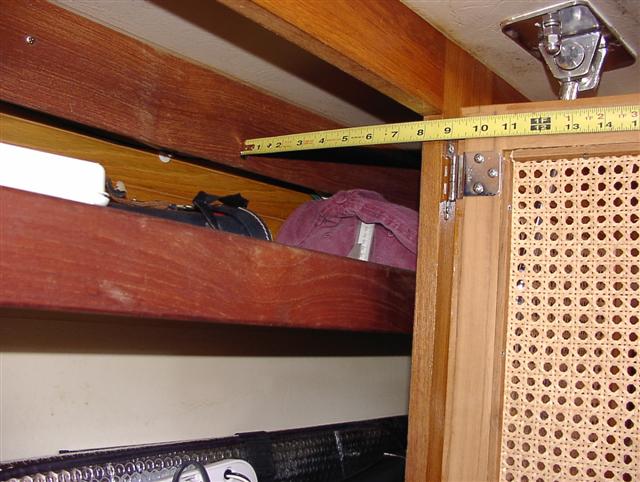
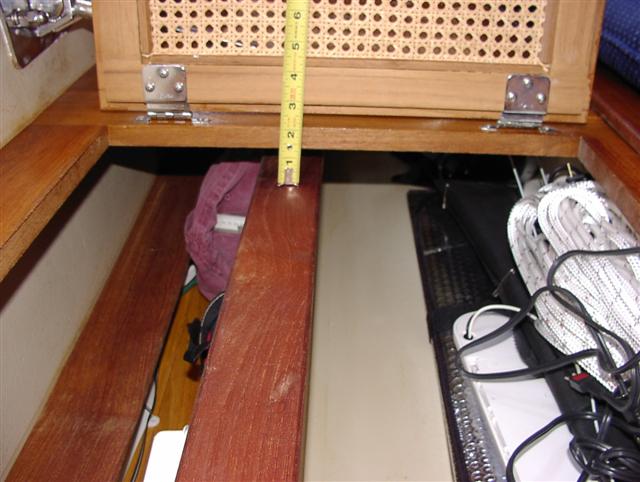
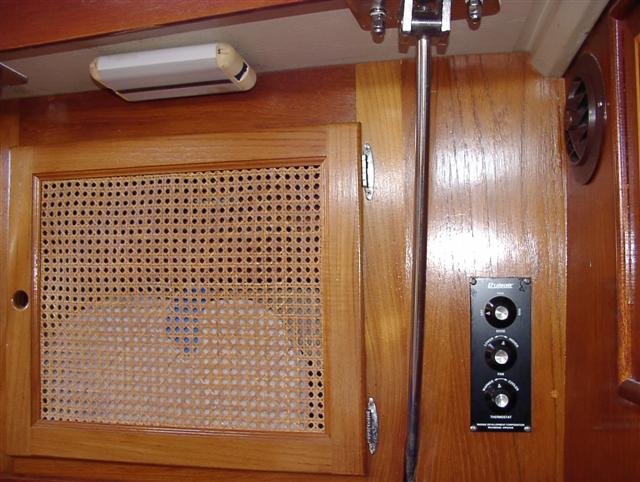
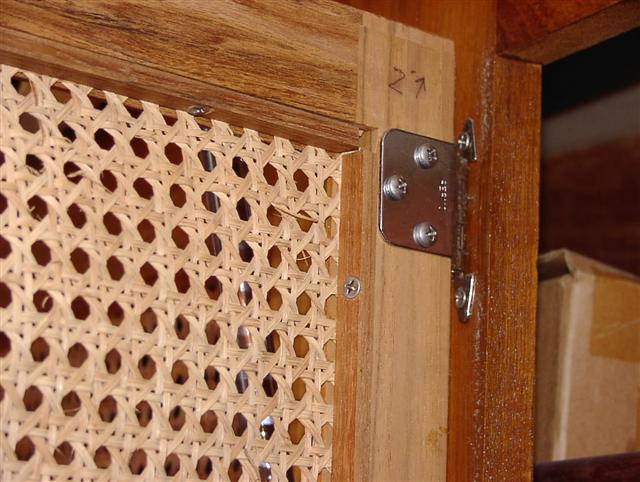
Yet another option... The PO removed the black plastic sliding doors and installed cabinet doors. The doors and frame are made of teak. The doors have pre-fabricated wicker cane panels. The PO added a cabinet in the v-berth to match. They provide a lot of space to store stuff that won't end up flying around on a close reach in a stiff breeze. The cabinetry has enough clearance to allow easy removal of the chain plate rods for re-bedding. These cabinets are not easily removed. the PO had the doors made from scratch. If you look at the picture "Cain attachment detail", you can see the details of the door construction. The door frame is 1x2 teak stock that has been routed with a rail and stile bit set to form the connecting joints of the frame. A straight router bit was used to make the inside rabbit for the cane panel in the door frame and the outer rabbit so that the door frame sets into the cabinet. The pre-made cane wicker panel is held in the frame with teak strips that are held in place with screw into the frame. The salon cabinet doors clear the salon lights that are mounted under the deck by at least 1.5". I placed a tape measure in the shots too so you could get a perspective on how they relate to the original shelves. Notice that the cabinet face tucks in behind the original lower shelf lip. The cabinet face is screwed to this lip to hold it in place. The top is secured at the ends of the cabinets and with teak cleats which run behind the top rail of the cabinet behind the chain plate rods. The cleat is screwed into the deck and the cabinet face to the cleats. You can see the teak plugs in some of the pictures at the top of the cabinet frame. | Yet another option... The PO removed the black plastic sliding doors and installed cabinet doors. The doors and frame are made of teak. The doors have pre-fabricated wicker cane panels. The PO added a cabinet in the v-berth to match. They provide a lot of space to store stuff that won't end up flying around on a close reach in a stiff breeze. The cabinetry has enough clearance to allow easy removal of the chain plate rods for re-bedding. These cabinets are not easily removed. the PO had the doors made from scratch. If you look at the picture "Cain attachment detail", you can see the details of the door construction. The door frame is 1x2 teak stock that has been routed with a rail and stile bit set to form the connecting joints of the frame. A straight router bit was used to make the inside rabbit for the cane panel in the door frame and the outer rabbit so that the door frame sets into the cabinet. The pre-made cane wicker panel is held in the frame with teak strips that are held in place with screw into the frame. The salon cabinet doors clear the salon lights that are mounted under the deck by at least 1.5". I placed a tape measure in the shots too so you could get a perspective on how they relate to the original shelves. Notice that the cabinet face tucks in behind the original lower shelf lip. The cabinet face is screwed to this lip to hold it in place. The top is secured at the ends of the cabinets and with teak cleats which run behind the top rail of the cabinet behind the chain plate rods. The cleat is screwed into the deck and the cabinet face to the cleats. You can see the teak plugs in some of the pictures at the top of the cabinet frame. | ||
| − | '''Paul Shields, ''pablo's girl'' #551''' | + | '''Paul Shields, ''[[pablo's girl]]'' #551''' |
Port Salon Cabinet View | Port Salon Cabinet View | ||
| − | [[Image: | + | [[Image:Port_salon.JPG]] |
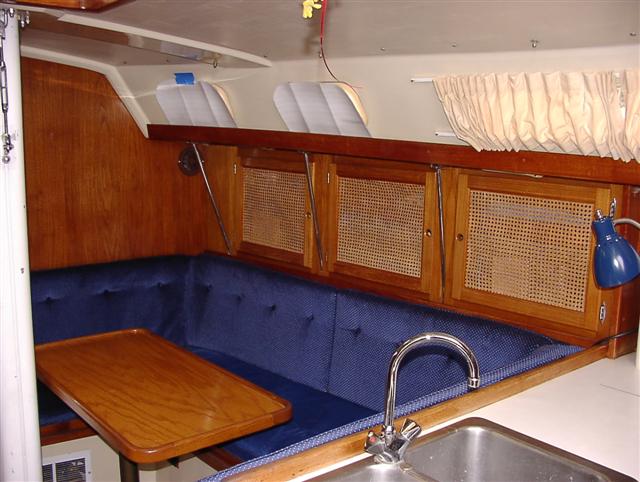
Starboard Salon Cabinet View | Starboard Salon Cabinet View | ||
| − | [[Image: | + | [[Image:Starboard_salon.JPG]] |
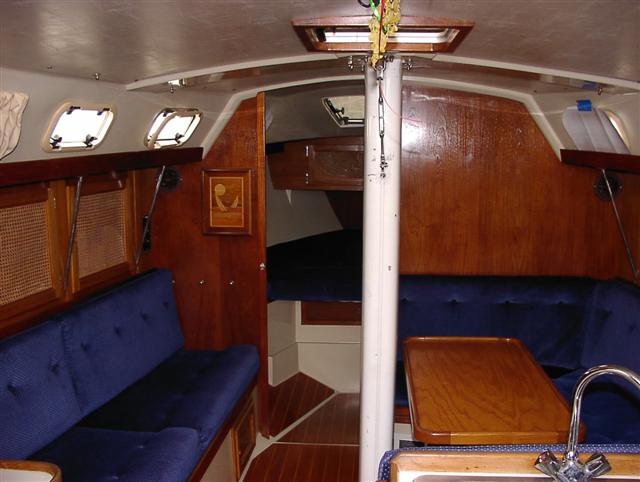
Salon to V-berth View | Salon to V-berth View | ||
| − | [[Image: | + | [[Image:Salon_to_v-berth.JPG]] |
Port Aft Salon Door | Port Aft Salon Door | ||
| − | [[Image: | + | [[Image:Port_aft_salon_door.JPG]] |
Port Middle Salon Door | Port Middle Salon Door | ||
| − | [[Image: | + | [[Image:Port_middle_salon_door_with_dimensions.JPG]] |
Port Middle Salon Door | Port Middle Salon Door | ||
| − | [[Image: | + | [[Image:Port_middle_salon_door.JPG]] |
Port Forward Salon Door | Port Forward Salon Door | ||
| − | [[Image: | + | [[Image:Port_forward_salon_cabinet_door.JPG]] |
Cain Attachment Detail | Cain Attachment Detail | ||
| − | [[Image: | + | [[Image:Cain_attachement_detail.JPG]] |
Latest revision as of 04:44, 21 October 2011
Q: Has anyone come up with a better looking cover for the shelves behind the early model 34s than those ugly black plastic sliding doors..and if not can those be replaced, as one of mine is broken?
Yes, there is a nice ash batten cover that will go over the black plastic sliding doors. There is a picture and further details in the C-34 section of the Aug 1997 MAINSHEET Magazine.
Ron Hill, Apache
Another option... I purchased sliding doors made out of 1/8" teak plywood; these were cut to size and shipped to me by Yukon Lumber, in Norfolk, VA. They look great and cost about $70, including cutting and shipping. They're thinner than the original, but that's no problem, and in fact slide more easily
Bryan Pfaffenberger, Juliana #680
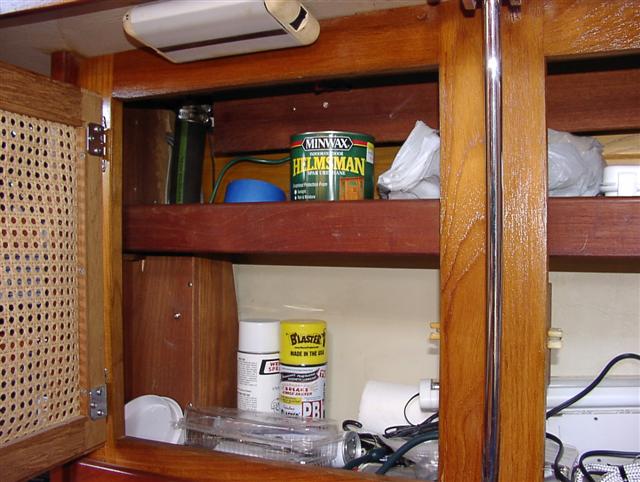
Yet another option... The PO removed the black plastic sliding doors and installed cabinet doors. The doors and frame are made of teak. The doors have pre-fabricated wicker cane panels. The PO added a cabinet in the v-berth to match. They provide a lot of space to store stuff that won't end up flying around on a close reach in a stiff breeze. The cabinetry has enough clearance to allow easy removal of the chain plate rods for re-bedding. These cabinets are not easily removed. the PO had the doors made from scratch. If you look at the picture "Cain attachment detail", you can see the details of the door construction. The door frame is 1x2 teak stock that has been routed with a rail and stile bit set to form the connecting joints of the frame. A straight router bit was used to make the inside rabbit for the cane panel in the door frame and the outer rabbit so that the door frame sets into the cabinet. The pre-made cane wicker panel is held in the frame with teak strips that are held in place with screw into the frame. The salon cabinet doors clear the salon lights that are mounted under the deck by at least 1.5". I placed a tape measure in the shots too so you could get a perspective on how they relate to the original shelves. Notice that the cabinet face tucks in behind the original lower shelf lip. The cabinet face is screwed to this lip to hold it in place. The top is secured at the ends of the cabinets and with teak cleats which run behind the top rail of the cabinet behind the chain plate rods. The cleat is screwed into the deck and the cabinet face to the cleats. You can see the teak plugs in some of the pictures at the top of the cabinet frame.
Paul Shields, pablo's girl #551
