Difference between revisions of "Fuel Tank Cleaning and Sender Replacement"
(fuel tank removal and cleaning by Ron Hill) |
Mark Elkin (talk | contribs) |
||
| (One intermediate revision by one other user not shown) | |||
| Line 1: | Line 1: | ||
| − | + | '''By Ron Hill, ''[[Apache]]'' #788''' | |
| − | '''By Ron Hill, ''Apache'' #788''' | ||
Latest revision as of 07:36, 19 October 2011
By Ron Hill, Apache #788
| A few years back I wanted to remove my fuel tank and have it cleaned out. I found a number of firms that cleaned tanks, but when I told them it was a fuel tank their reply was, “NO!” It didn’t make any difference if it was diesel or not; they still wouldn’t touch it.
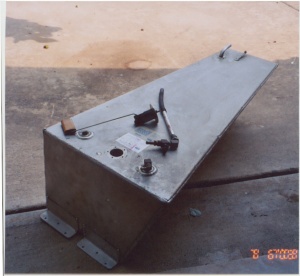
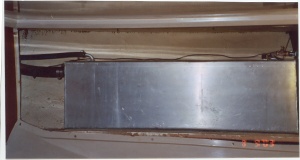
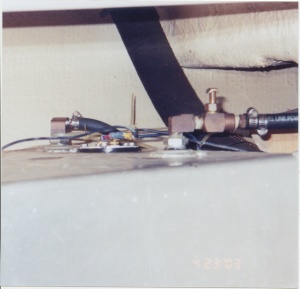
When my fuel gauge stopped working, I decided it was time to remove the tank, clean it myself and also replace the sending unit. The first hurdle was what to do with the fuel in the tank? I estimated that I was down to about ½ tank (.5 gal per hour x 6 hours). The way my fuel plumbing is routed is from the tank and pickup tube, to the Racor filter, to the electric fuel pump, and then to the engine. I reasoned that if I removed the fuel hose from the output side of the electric fuel pump and replaced it with another 3-foot hose into clean 5-gallon fuel jugs, I’d be pumping 2 micron filtered fuel. It’s easily done by turning on the key switch and then controlling the on/off of electric fuel pump with the battery selector switch from down below. I emptied the fuel tank and placed the full fuel jugs under the dinette table for use later. It took me longer to clean out the aft cabin (my “garage/attic”) then it did to remove the port side panel and the tank! The tank is secured with six screws and hose clamps on the fuel fill, fuel vent, fuel pickup and fuel return lines. Then disconnect the + & - wires from the sending unit and the tank slides right out. It’s a little bulky and you might want a second person to help getting it up the steps and off the boat. There will be about ½ gallon of fuel remaining in the tank, but it won’t spill out until you turn the tank on end. The tank definitely needed cleaning as the remaining fuel was “sludge” and the inside of the tank was black rather than shiny aluminum. I had a pressure washer to do the cleaning, but didn’t have a small angled nozzle to get inside the tank so I decided to try something else first. I put 1/3 gallon of acetone in the tank, sloshed it around and poured it out capturing the residue in a shiny coffee can. It was BLACK, so I did it a few more times! I used a coffee filter to catch and examine the final residue. I repeated that procedure and went through 2 gallons of acetone until I could see shiny aluminum on the inside of the tank and no residue. CAUTION: I did this outdoors in a well-ventilated area where there was no hazard of a spark. Acetone is the main ingredient in the spray can carburetor cleaner. Replacing the fuel sender is straightforward. The old sender was made by the Medallion Instruments Inc. (B-1321) and is similar to the TEMPO unit CALPU #280050. In the West Marine catalog it’s TEMPO model #105090 for a 6”to 12” tank. The tank measures 12” deep, so I used that TEMPO sender and it matches the 25 to 240ohm compatibility to the gage in the engine panel. I used my old 5 stainless machine screws so I didn’t have to retap the old holes for the finer threads of the new screws that came with the new sending unit. Check your pick up tube to make sure that the screen has been removed and that you do in fact have a 4” to 5” rubber hose attached to the end of the 9” aluminum pick up tube. This extension curves and sits on the bottom. That extension is very important so you draw fuel from the bottom (so sludge/water can’t accumulate) and you don’t run out of fuel with a ¼ tank that won’t feed. The tank is stamped “25 gallon,” but as Bob Lasser, hull #412 (MAINSHEET August 2002) also found, I could only fill it with 24.5 gallons of fuel. The accuracy of the gauge versus actual fuel is close, but not exact. The tank is asymmetrical, wider at the top and front while being narrower at the aft end and bottom. With the 12” deep tapered tank, the float will be horizontal, but you’ll be less than ½ full gallons wise (because the upper half [6 inches] of the tank has a greater gallon capacity than the lower 6 inches)! Therefore, you need to keep that in mind when reading the gauge. When I considered the cost of filters, the accumulation of crud in the bottom and the ease of removal; I’d recommend that the fuel tank be removed and cleaned every five or six years, because over time “stuff” grows in diesel that sits. |


