|
Modifying a Garhauer Lift
The Garhauer lift is a great “back saving” piece of equipment to have onboard. However, if you have to mount it close to a Bimini it’s difficult to operate the control line. The cam cleat on the lift is usually higher than the Bimini rail and hard to get at to disengage the line from the cam cleat!!

Unmodified Lift and Lines
What I did was to move the cam cleat (w/eye strap) to a position lower on the upper tubular section of the lift, so it was easily accessible with my Bimini up. First, I purchased an eye strap (1 ½” hole centers) and mounted it on a piece of 5/16” Lexan in the same position as the old cam cleat. I matched the bolt threads and used the factory threaded holes to mount it in place. I put the eye strap on the Lexan pad to give it added height so the line couldn’t rub against the stainless steel on that 90 degree bend.
You can also use a “bullseye” fairlead instead of an eye strap. Then you could skip the Lexan pad. What you’re really looking for is a protected “guide” for the line to go through.

Typical Line Strap

Replaced Cam Cleat with the Strap and Lexan
Next, I cut another piece of Lexan to mount the cam cleat (w/eye strap) on. That piece of Lexan had to be higher in size (than the cam cleat) so it could be mounted on the upper tube. I drilled & taped two holes in the upper tube. Then I mounted the Lexan to the tube and the cam cleat to the Lexan.

Repositioned Cam Cleat and Lexan support
My total cost was about $2+ for the new eye strap, as I used left over nuts, bolts and washers from other projects. I used Lexan (poly carbonate), but you could use a piece of sturdy aluminum or stainless for the new mounting pad for the cam cleat. Just don’t use acrylic as it’s too brittle and will crack.

Completed Modification
Re thread the lift line and you’re “good to go”! It’s easy to do and the entire project took less than 2 hours to complete. Now I can get at the secured hoist line cam cleat easily and not have to do body contortions around the Bimini frame.
EXTRA - EXTRA - EXTRA
Here's how Ron mounted the lift on Apache.
 |
|
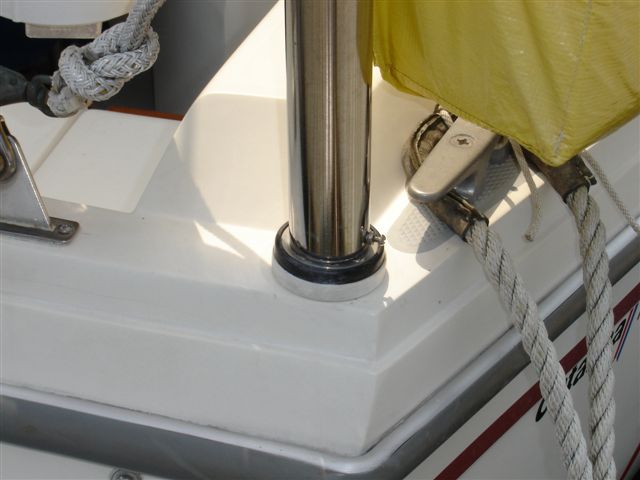
The black piece is part of the mounting kit. Normally it mounts directly to the hull with 4 screws. But Ron did not want to drill 4 holes in his transom, so he made the white disk below the black piece from Starboard. The white disk attaches to the transom with just one screw and the black piece is screwed into the white one. The white piece is also "notched" slightly (on the far side) to allow for the corner of the coming. --Mark
Ron Hill
"Appache", #788

