Menu

Show posts

This section allows you to view all posts made by this member. Note that you can only see posts made in areas you currently have access to.

Show posts Menu

Topics - Breakin Away

#1
Here's my easy way of de-tensioning and re-tensioning the alternator belt for adjusting the alternator position (i.e., increasing the belt tension). It works great for my M35B with original 50 amp alternator. Not sure about other motors or other alternators:

Loosen bolts attaching pulley to coolant pump. Remove the one furthest away from the belt, if needed. The pulley pivots, fully de-tensioning the belt. Then you can loosen the alternator bolt and easily nudge it out 1/4"-1/2", and re-tighten everything to re-tension it. If the resulting tension is too much or too little, repeat and re-adjust. It's really quick and requires no special tools:
#2
In this message from late 2019 I mentioned that I was considering emptying my fuel tank during winter layover:

https://c34.org/bbs/index.php/topic,10409.msg80510.html#msg80510

I was unhappy with the quality of my diesel fuel, and with the frequency with which I had to replace my costly spin-on Racor filters. I tried a number of things to improve the fuel (I use Biobor and Star Tron Enzyme at the recommended dosages), and now I think I've finally found the answer.

After emptying my fuel tank for the past for four winters, I am happy to report a dramatic improvement in fuel quality. My current Racor filter is now over 25 months old (and destined to last even longer), already about double the age of my prior filters that plugged after about 13 months. I was getting a little nervous for waiting so long this time, so last week I disassembled it and had planned to replace it. However, the filter was pristine (see picture) so I'm leaving it in for another year..

Some history from my engine log documents the improvement in fuel quality:

  • My first Racor filter plugged on 7/19/2017. I aborted a planned overnight cruise, sailed home, and limped back into the slip at low RPM. The filter was 13 months old. I replaced it and the secondary fuel filter.
  • Replaced Racor filter proactively on 8/18/2018 (13 months old). Upon inspection, I could see that it would have clogged if I waited much longer, since the pleats were filled with gray-black stuff.
  • Racor filter plugged on 9/28/2019. I aborted a planned overnight cruise, sailed home, and sailed back into the slip. The filter was 13 months old.  I replaced it and the secondary fuel filter, as described here.
Up to this point, I had dutifully topped off my fuel tank every fall, following the traditional logic that eliminating headspace would minimize breathing and condensation and help preserve the fuel through the winter. For 2019 winterization, I decided to try the opposite, and ran my tank down as far as possible during the season, then drained the remaining diesel from the tank into jerry cans for storage at my home.

  • For spring commissioning in 2020, I siphoned the fuel back into the tank, filtering through a Mr. Funnel fuel filter (which claims to remove water along with particulate contaminants). I operated the entire 2020 season without a fuel filter incident.
  • At the end of the 2020, 2021, and 2022 seasons, I again ran the fuel down to 5-10 gallons at the end of the season, and drained the tank contents into jerry cans for storage at my home. Upon subsequent spring commissioning, I again siphoned the fuel back into the tank through a Mr. Funnel filter at the beginning of each year.
  • I had replaced the Racor filter (and secondary fuel filter) proactively on 4/24/2021 as part of spring commissioning. The Racor bowl remained pristine for the entire 2021 and 2022 seasons and so far this year. The filter that I show in the photo below is the one that I installed in April 2021 and will remain in place.
After 3 years of a control experiment (topped off fuel tank for winter), and 4 years of testing the alternative (drained fuel tank for winter), I conclude that the storage of the fuel in sealed containers during the off-season is the reason for my dramatic improvement in fuel quality.

#3
The manual for my 2001 MkII (7th edition dated 12/14/99) has a hand-drawn sketch of the packing gland by Gerry Douglas that says to use 3 wraps of 3/16" x 3/16" packing.

The MkII manual on this site (also 7th edition, but dated April 22, 2002) has a computer drawing by Kent Nelson that says to use 2 wraps of 1/4" x 1/4" packing.

The stuffing box does not appear to have changed, based on comments from Lowell at Catalina Direct and based on comparing my factory original stuffing box with the replacement that was installed in 2019 (which CD said had 1/4" packing). When viewing the stuffing box on the CD website, their "May we recommend" shows both 3/16" and 1/4" items.

Changes like this do not happen accidentally. Does anyone know why Catalina made this change? Have any of you tried both and can provide comments on whether the 1/4" packing was more difficult to install and/or too tight leading to heat and difficulty establishing a drip?
#4
Main Message Board / My stuffing box is over-stuffed
February 27, 2023, 08:47:51 PM
My stuffing box was replaced along with a number of other things 4 years ago. It was done by yard staff as part of an insurance claim. I had them use the Catalina Direct stuffing box which came pre-packed with white/yellow teflon all-synthetic (non-graphite) stuffing:


I really like the graphite-free Teflon stuffing. It was easy to adjust, very forgiving, and of course avoids the corrosion issues caused by graphite. Catalina Direct's web page says that it is 1/4" packing: https://www.catalinadirect.com/shop-by-boat/catalina-30/engine/props-etc/stuffing-box-for-1quot-shaft-1-58quot-id-hose/

This past weekend, with the boat on the hard, I did something I had never previously done - I backed the nut completely off. Thank goodness I was on the hard, because I could not get it back on! Close inspection shows that it was over-stuffed, and there are less than 2 threads left (yes, I know there was some de-zincification):


Apparently the stuffing box shipped with three wraps of the 1/4" stuffing, and that leaves too little threads to grab on to. I'm shocked that I operated the boat for 4 seasons with so little thread protecting my boat from sinking. (I never saw the packing box before installation - it shipped directly to the boat yard.) I'm still wondering if this packing material was "spongy" and maybe expanded when I took the nut off. I used tools to try to "push" the nut aft against the stuffing box, but I could not get the threads to grab. Unfortunately, in trying to get the nut back on, I lost some thread in the process, which will make it virtually impossible to get the nut back on unless I remove one wrap of packing. Here you can see the sliver that came off the threads:


My prior stuffing box had less stuffing, leaving more threads above the stuffing:


Have any of you used this pre-packed stuffing box from Catalina Direct? Did you have similar issues? (I've tried to read everything on this topic in the tech notes, wiki, and messages, and have seen no mention of this.)

Obviously I will have to redo the packing. I'm unwilling to use GPU or GTO, or any other graphite containing material due to @mainesail 's concerns over galvanic corrosion. Does anyone have a source for all-Teflon stuffing? Looks like CD doesn't even have it unless you buy another pre-stuffed box. How about this? https://www.amazon.com/Minseal-1400L-Compression-Lubricated-Mechanical/dp/B07HGP5VWR
#5
I am continuing to diagnose and map out a plan to fix the problem described here in another thread. I am seeing bronze flecks dripping from my standard stuffing box:
Quote from: Breakin Away on October 11, 2021, 05:31:41 PM
I think I am going to do some additional inspection and measurements before buying anything. When placed into gear, the torque of the motor pushes the shaft up (slightly) and to port (mostly), causing shaft-to-nut contact
at about 2 o'clock when looking aft toward the nut...

A few additional facts:

I originally discovered this issue when I put a white tissue under the stuffing box to help detect dripping water, and found fine bronze particles. At that time I did not know how long the problem had been happening. I've been putting down the tissues periodically for awhile, but this time I happened to have some sunlight hit the tissue at just the right angle to see some shiny specs, which led me to get out a magnifying glass and take a closer look.

Alignment appears to be fine when the motor is in neutral or not running. The packing nut is well centered on the shaft in this state, with an even 0.01" gap. The issue only appears when in forward, and gets worse at higher RPM (due to higher torque on the mounts).

The stuffing box was replaced in early 2019, along with original bronze shaft (Aquamet G22 upgrade), strut, prop, and coupler. I just inspected the old stuffing box and shaft that were removed at the time, and can clearly see wear patterns that suggest that this issue had been present (and undetected) for quite awhile before 2019. I purchased the boat in 2016, and not sure the surveyor would have detected this.

There are no vibrations in the system, except for idling below 900 RPM (according to the console tach). I have it on my list to recheck the idle RPMs using a strobe on the motor - it might actually be below the M35B spec of 800-1000 (Service Bulletin #236). Getting up to 950-1000 immediately eliminates the vibration. The <900 RPM vibration happens in neutral, so it appears to be unrelated to running gear or alignment...
The first mechanic who looked it over suggested that I need new motor mounts. I am not convinced that this would actually solve the problem, and since the mounts are very expensive I'm looking for a second opinion before getting into a high-dollar replacement. I spoke to another mechanic this week who suggested switching to a "self-aligning" gland. I've searched around to try to see what he's talking about, and the closest thing I found was this:

https://www.go2marine.com/Bronze-Packing-Boxes-Self-Aligning-Gland-Type

So far as I can tell, these are not available for 1" shafts, and the guy said that what he has in mind actually requires tapping into the cooling system. I asked if he was talking about a PSS seal, and he said no, this is something different. So I'm not sure exactly what he is suggesting.

But that got me to thinking, why not just do a PSS seal?

I'd be interested to hear your comments about the various options that you may have used instead of the "standard" packing box? Does anyone have a PSS seal? Other type of packing box?
#6
Main Message Board / Removing engine cabinet on MkII
October 10, 2021, 09:46:27 AM
Hi all,

I have some work coming up on my C34MkII that will be a lot easier if I can remove the forward engine cabinet. I've managed to remove the aft berth cabinet many times for easy access to HX and transmission. However, every time I've tried to remove the forward cabinet, it was blocked in by the corner molding/aft berth door jamb on the starboard side and/or the port side corner molding along the head. Removing that glued-in molding looks like it could cause severe damage, especially if it breaks on the way out.

Have any of you figured out a better way to get the forward engine cabinet out? I believe that this is specific to the MkII boat models, since I've heard of it coming out more easily on the earlier boats.
#7
Main Message Board / Dutchman Monofilament Specs
September 07, 2021, 10:14:01 PM
My Dutchman monofilament broke for the second time this weekend. I need to replace it because it's clearly at the end of life due to UV degradation. I want to buy a genuine Dutchman replacement. A few months ago (when it broke for the first time) I called them and when they heard I had a C34 they immediately said "order the 40-2 system monofilament". I've downloaded the manual, and it says that 40-2 is 2.0 mm diameter. My monofilament measures 2.95 mm. I don't understand the discrepancy. Perhaps a previous owner "upgraded" the line. I'm nervous about getting something smaller than I already have, because a wet sail puts a LOT of weight on the monofilament. (I think that's how it broke, since it was raining and the sail was very heavy.) Also, if the discs have been "broken in" on larger monofilament, I'm concerned that a smaller monofilament may slip in the discs. (Just like a clutch doesn't grip an undersized halyard.)  I would just replace the discs with new ones, but not at $56 plus $17 shipping for two sets!

Have any of you replaced the Dutchman monofilaments? What diameter do/did you have?
#8
Hi all,

We've purchased a waterfront property that includes a deeded slip on a private community pier. This spring I'll be leaving my marina (which has nice full-length finger piers) and moving to my own slip, which has a relatively short finger pier. If I back my boat into the slip, the entrance gate will need to be 10-12' down the finger pier thanks to the dinghy that hangs on davits and stern seats on the pushpit. That distance is probably too far (I still need to measure the finger dock). Because of this, I will likely need to pull the boat forward into the slip.

My C34 currently lacks a forward entrance gate, and I need to figure something out. As a temporary measure, I'm considering replacing the lifeline clevis pins at the bow pulpit with quick-release pins to allow easy access to the bow aft of the pulpit (which ends about 6' aft of the anchor on its roller). Obviously I'll have to reduce the tension a bit to allow for removing/replacing the pin. In order to keep the entire lifeline from going slack, I'm thinking of attaching a cable clamp just in front of the forward stanchion to retain tension on the rest of the lifelines. (Unfortunately, the lifeline is not long enough for a pelican hook, and I've been unable to find coupling nuts to extend the threads enough for the pelican hook.)

If things work well with this temporary arrangement, I'll consider replacing the lifelines (which are due for replacement anyway) with ones that are appropriately sized for pelican hooks.

Any other thoughts on this? Have any of you had to add a forward gate to your C34?
#9
Hi all,

I'd like to lubricate my throttle and shift cables, but don't see anything in the manual. What lubricant is recommended? What are the lube points? How do you remove the compass to gain access to the ends that are in the pedestal?

I'm sure someone has written this up somewhere, but haven't been able to find anything except a picture in the Wiki. Can someone please point me in the right direction?
#10
I need to mark my hull for future sling placement before going back in the water this season. There are little arrows there currently, but I do not trust them. I do not know who put them there, and they are wrong (one side is 18" further forward than the other side, which does not make sense).

The travel lift has a crossbar that I need to avoid hitting, so I back the boat in and keep it as far forward as possible to avoid the backstay hitting the crossbar when the boat is lifted out of the water. For this reason I need to place the sling as far aft on the boat as possible, but obviously I have to be careful that the sling is sufficiently forward of the shaft, or I'll end up with a bent shaft and other damage.

My question is how far forward of the shaft does the sling need to be to ensure the sling doesn't damage the shaft? Do any of you have sling markers on your hull, and if so, where are they placed?
#11
Main Message Board / Racor R15P vs. R20P
March 07, 2020, 08:50:16 AM
Some interesting specs and pricing on Racor spin-on filters.

My boat was supplied with a Racor R15P filter, and I've used exact replacements for the last few years. I'm looking for another one (or two), and getting sticker shock on the prices. Spin-on prices are much higher than the turbine-type filters, but vertical clearance is very limited in my boat, so these spin-on types fit better despite the high price on filter elements. I assume that is why Catalina used them on the MkII boats.

I'm currently getting about 13 months life out of my primary filters. I'm working on improving my fuel management to reduce filterable debris. Another alternative is a slightly larger filter element, which would basically trap more stuff before clogging. I might want to do both (belt and suspenders approach). The Racor R20P filter is 3/4" longer than the R15P and has about 30% more solids capacity (SAE J905 test method). In shopping around, I noticed that the R20P filters are about $10 less expensive than the smaller R15P!

I've measured that I have 1.5"-2" clearance to the hull under my filter bowl petcock, which I think would allow sufficient clearance to spin off/on the longer R20P filter element.

Do any other MkII owners have any experience with switching over to the R20P?
#12
Hi all,

Today was a nice day with 55F temps (and warmer under the boat cover), so I decided to replace my broken-and-unfixable solar vent that's in my salon hatch. I had already removed the old vent and cleaned off the bedding, so I applied butyl tape to the mounting flange, pressed it on, and pressed the 3 bolts through the same screw holes that were there from the old flange. I had to push a little to pop the screws through the butyl tape, and all of a sudden I heard a little "crack". The damage went all the way from that screw hole to the dog handle. Whoever installed the prior solar vent had done a very poor job, with a very ragged hole with lots of jagged edges and cracks just waiting to propagate. I'm actually relieved that this happened now, since I sometimes step on the hatch when dropping the sails, and I could imagine a catastrophic failure might have happened at some point. I now have to replace the hatch lens, and am considering NOT installing the solar fan in the replacement lens because of how the required hole could disrupt the integrity of the lens.

I'm looking for advice on buying and installing a replacement hatch and/or lens. A few things first:

  • The salon hatch measures out as a Lewmar Low Profile Size 44
  • Lewmar specs this as 5/16" thick acrylic, but my hatch is DEFINITELY only 1/4" thick. I wonder: Was my acrylic an (inferior) aftermarket replacement installed by prior owner, or did Lewmar change the thickness spec from 1/4" to 5/16" after mine was made?
  • My boat was made right around the time Lewmar transitioned their hatches from their MK1 design to their MK2 design. Based on their identification guide, I have the older MK1 version, because I have a "roll pin" next to the hinge. https://www.lewmar.com/sites/default/files/Low%20%26%20Med%20Pro%20-%20Mk1-Mk2%20identiification.pdf
  • Their guide also refers to a "lens code" stamped near one of the dog handles, but my hatch does not have one. These codes were apparently stamped starting in 1998. So my hatch was either made before 1998 (odd for a 2001 model boat), or the lens is an aftermarket replacement.
  • Lewmar's replacement lens sold by many dealers (their part #361058990) works with the MK2 model only, so I cannot use this. https://www.defender.com/product.jsp?path=-1&id=4202468 I wonder what it is about the design change that makes the new lens incompatible.
  • For this reason, I may have to replace the whole hatch and frame, which will be a MK2 version: https://www.lewmar.com/node/11296?v=24362
Do any of you have advice about using third-party fabricators? How fast are they? (Boat's under cover now, but not for too much longer.) How about installing a MK2 hatch and frame in a MK1 opening? (Are corner radii a perfect match?) Other advice on installation tips? (I searched and found a couple of things, but nothing on these MK1 and MK2 questions.)

I may post some pictures tomorrow, but I'm out of time for now.
#13
Quick question:

In the plumbing from the water tanks to pump to the faucet(s), is the hot water heater upstream of the pump (heater between tanks and pump) or downstream of the pump (pump between tanks and heater)?

I will be winterizing tomorrow evening, and the location of the water heater in the plumbing schematic will impact how I do it.

FWIW, I've seen the various posts and blogs that say to install a bypass of the hot water heater, but I haven't done it yet because the needed fittings are impossible to reach in my installation.
#14
Main Message Board / C34MkII fuel tank maintenance
October 01, 2019, 07:10:26 AM
I'd like to consider doing some cleaning/maintenance on my MkII (model year 2001) fuel tank, and would appreciate some guidance for those of you who have done this before. How do you access the tank? It seems like might be glassed in on top, with only a couple screw-off ports in the port locker. I know that one of the ports covers the on-off valve from the dip tube. Is there a way to remove the dip tube?

Does the tank have any inspection ports installed at the factory? Is there a way to get to them without cutting apart the locker? Is there a side panel in the aft berth that gives any better access? What is the tank made of?

It seems like the fuel fill port is not a straight drop into the tank, so you can't insert a dip stick or pump-out wand into the tank. How else do you empty the tank?
#15
Main Message Board / Online prop sizing calculators
April 17, 2019, 07:43:52 PM
For reasons mentioned elsewhere here, I need to buy a new prop right now, a year earlier than planned. I had hoped to do some full throttle testing on my old prop this season, but that's no longer possible, so I have to go with the data I have available. If I can get some confidence in the specs, I may go with Flexofold instead of fixed prop. I know this has been discussed widely here, and we have somewhat different motors and transmissions. For this thread I'd like to focus on modeling results.

I spoke to one prop shop who took a few numbers from me and suggested I go with 15" x 10" 3-blade. I also spoke to CatalinaDirect and they took a much more extensive range of data and will get back to me tomorrow with their results.

I did find a couple of online calculators that gave me results ranging from 17" x 11" (Michigan Wheel calculator at https://www.miwheel.com/inboard-propellers/prop-it-now/ ) to 15" x 9" (https://www.vicprop.com/displacement_size.php). That's a huge range that just increases my confusion. I am curious whether any of you have any experience with these calculators and how they match up with your own experience.

Also, I found this article that warns of the dangers of over-propping, and makes me tempted to "leave well enough alone" with my current pitch: http://www.oceannavigator.com/January-February-2017/Are-you-over-propped/

FWIW, 15" x 9" 3-blade Michigan Sailer is what I currently have, and was thinking I'm a little under-pitched based on my max RPM of around 3400. But as I study this, I learned that there's more to this than just pitch, and things like E.A.R. can have an effect. My original Sailer design has very low E.A.R. (skinny blades) and is now discontinued and replaced by more skewed models that have significantly higher E.A.R. that could deliver more thrust (and more sailing drag) at the same pitch. That just complicates things more.

I'm open to your comments on the two models linked above, and any other online calculators that you're aware of. Many of them seem to be for powerboats, so one must select carefully.
#16
Main Message Board / Urgent: Sourcing a new strut
April 16, 2019, 06:05:11 PM
Hi all,

My boat needs a new prop, shaft, and strut. I think I have good leads on the first two, but the strut is a concern. The boatyard's supplier is planning to source it from Buck Algonquin. I believe that CatalinaDirect has the exact part, with the perfect (square) hole locations and perfect curve of the mounting plate, making for the best possible fit (and least man-hours of work). I know nothing about Buck Algonquin except some online pictures that show "generic" struts with no holes and a flat mounting plate. However, I realize it's also possible that Buck Algonquin might have an identical one to the Catalina/CatalinaDirect, and might even make it for them.

Do any of you guys know about Buck Algonquin as a replacement strut for our boats?
#17
Hi all, I think my belt needs tightening. I don't hear any squealing and don't see excessive rubber dust, but I do smell a faint burning rubber. IIRC, my alternator measured 144F when running at crusing speed, but everything around it was around 160F, so I don't think it's excessive. (Tell me if it was.) I did see a little in-out vibration of the belt in the long run from crankcase to alternator.

I see a lot written about tightening the belts for the smaller (older) motors, but not the M35B. From what I can tell, the alternator is in a very nice position to loosen the top bolt and pull it outward. Is it that simple? Is there another bolt that's the pivot point? Does it need to be loosened, and is it hard to access.

I'd appreciate any advice from someone who has done this on the M35B. I have the standard 50A alternator, not the big 100A upgrade.
#18
Main Message Board / Slipping transmission?
April 09, 2019, 11:30:55 AM
My boat is on the hard. While spraying some Barnacle Barrier on my prop, I noticed a lot of resistance in rotating the prop. It would turn, but only with a lot of effort. I climbed into the cockpit, removed the helm cover, and discovered that the transmission had been shifted into forward. (This probably happened when I removed the steering wheel for the winter, or perhaps knocked into it without the protection of the wheel.) After shifting back to neutral, I was able to rotate the prop easily, the only resistance being caused by my cutlass bearing.

But this begs the question: Is my ability to rotate the prop in forward (albeit with quite a bit of resistance) a sign of a problem with my transmission? Prior owner had it rebuilt about 170 hours ago. Is the prop supposed to be fully locked when in forward? Or is there meant to be some frictional movement, which could be why the manual instructs NEVER to sail with the transmission in forward?
#19
Main Message Board / Where to find Rydlyme?
April 01, 2019, 08:04:24 PM
Hi all, I'm OK paying $31 for a gallon of Rydlyme. But $17 for shipping? Not so much!

Is there a brick and mortar place that sells this near me (Philadelphia area)?

Also, am I correct that Rydlyme can be used for cleaning both the raw water side of a HX (clean in place without having to remove, as Ron Hill does with Lime-a-Way), as well as cleaning/flushing the EG freshwater side (presumably for descaling cylinder liners and the outsides of the HX tubes without disassembling)?

If I can't find an acceptable source for Rydlyme, I see that Lime-a-Way is available at my local Home Depot for $5 for just under a quart. However, I've read the arguments against Lime-a-Way because it is claimed to be strong enough to cause damage to the metals. Has anybody looked over the SDSs from these and come up with a dilution formula? If not, I'll consider doing some calculations myself:

Rydlyme 5-9% HCl, pH "Unreadable, generally < 3":
http://www.rydlymemarine.com/assets/1/7/RYDLYME_MARINE_SDS_1112017.pdf

Lime-a-Way "Toggle" version 5-10% sulfamic/sulphamidic acid CAS 5329-14-6, pH 2 to 2.2:
http://www.rbnainfo.com/MSDS/US/Lime-A-Way%20Cleaner%20-%20Toggle%20EN%20GHS%20US.pdf
Interesting Wikipedia article that mentions Lime-A-Way: https://en.wikipedia.org/wiki/Sulfamic_acid

If nobody had done this, I'll do some molarity and pKa calculations to see what dilution of Lime-a-Way might create a similar activity as Rydlyme.

I'd gladly bypass all this and just buy Rydlyme if I could find a suitable local source. If not, it sure looks like Lime-a-Way could be diluted down to an idiot-proof (or even sailor-proof) level of activity, and the convenience of running down to Home Depot may be tempting.
#20
Main Message Board / Fuel gauge calibration
March 02, 2019, 11:31:47 AM
For the last couple of seasons I have kept some logs of fuel gauge level vs. engine hours. I also keep track of exactly how much fuel we put into the boat, and top off completely once on the hard at the end of the season. My consumption has ranged from 0.55-0.60 gal/hr (depending on what date range I select). I typically cruise at 2200 RPM, though sometimes motorsail at a lower RPM.

One of the interesting results of all of this is a fuel gauge calibration chart. Once I've topped off and calculated average consumption, I can use that to back-calculate an estimate of how much fuel was in the tank at each fuel gauge reading. The end result is a calibration which is pretty much linear, but clipped at both ends. I recorded the reading in "eighths", in other words, 0=empty, 4=1/2 tank, 8=full, and 9=pegged above full. The points extrapolate to about 2.5 gallons in the tank if I ever let the gauge get all the way to "E", 10 gallons at 1/2, 17 gallons in at "F", and 18-25 gallons when pegged above F. (I assume here that Catalina's spec of 25 gallons for the MkII boats is correct, and includes all the volume in the vent and fill hoses when I top off completely.

I'm not sure if any of you have done something similar, so I'm offering it up for your comments:

#21
Main Message Board / Antifreeze: Which type is best?
February 11, 2019, 08:34:24 PM
I've read a couple dozen threads on these topics. Since all are a year old or more, I'll start a new one to add my questions and comments:

Engine coolant

Obviously MaineSail hates "Death cool", so that's out of the running. Everything I've found on this site says to use "ordinary Prestone". I don't know what the PO put in my boat, but since it was "green stuff" I topped off the reservoir with 50% Prestone Extended Life for the last couple of years, since they emphasize its compatibility with other brands/types. It's worked fine so far. But I've changed my freshwater pump this winter, and plan to flush/rinse/clean/rinse/refill my system in the spring. I want to use the right thing going forward. I was planning to use Prestone again because it's is so widely available everywhere, and I don't want to be driving an hour to get matching antifreeze if I'm in a remote area and need to top off.

However, I am also aware of Practical Sailor's Oct 2014 article that urged the use of heavy duty antifreezes that have anti-cavitation inhibitors that will prevent cavitation pitting. Drew Frye did the testing and repeated his recommendations over on Sailnet recently:

https://www.sailnet.com/forums/gear-maintenance/328002-antifreeze-diesel-engines.html#post2051576784

Among his recommended brands, Zerex G05 seems to be the most widely available, and very reasonably priced. But I see no mention of it here. Is there a reason for that? If you read the article, it seems that the problem is worst for engines with thin-walled wet sleeve liners, presumably because their thinness causes them to "ring" (like a bell) and thus drive the cavitation which enhances corrosion. (Anyone who plays a brass instrument knows that thin metals ring more than thick ones.) Does anyone here know if Universal employed thin wet sleeve liners in their designs? Or is this just a Yanmar problem?

I'd like to hear your comments.

Raw/potable water antifreeze

In reviewing most of the comments about this, I saw some concerns over damage to rubber parts like impellers, gaskets, and joker valves. I agree with the general comments that these parts are not damaged by antifreezes based on propylene glycol or ethylene glycol. However, EG is very toxic and cannot be released into waterways or watersheds, and impellers' lives will be shortened somewhat by being left compressed in the cam all winter even with glycols present.

However, some people also referred to using RV antifreeze, so I thought I'd repeat Maine Sail's warning that the cheap orange RV antifreeze uses ethanol in the formula, which will leach the plasticizers out of synthetic rubbers, causing them to harden and crack over time. Also, the denaturing agents that the Feds require to be included with the ethanol will cause a bitter taste in your potable water system that could take years to clean out (as I have learned after my PO used the orange stuff in our potable water tanks). So make sure to use the pink stuff (not orange) and read the label to ensure it does not say "combustible", as that's a giveaway that ethanol is present.

https://marinehowto.com/freshwater-system-winterizing/
#22
Quote from: Breakin Away on January 10, 2019, 10:55:26 PM
Quote from: Breakin Away on January 07, 2019, 09:15:52 PM
Breakin Away, try it now.
I tried again. Same result - it says no user by that name. I still think that someone should try creating a new userID to see if you can replicate the issue.

The website is also still not secure.
I still can't log in, even though I'm following your procedure exactly. No change at all - looks just like the screenshots that I posted before. Any progress on a fix? Has anyone tried to do a first-time login for the wiki, and if so, does anyone have a similar problem to mine?

I still think it would be great if you would let Ken follow up on his offer to create a new (temporary) account to try to replicate my problem. That could really help diagnose this.
#23
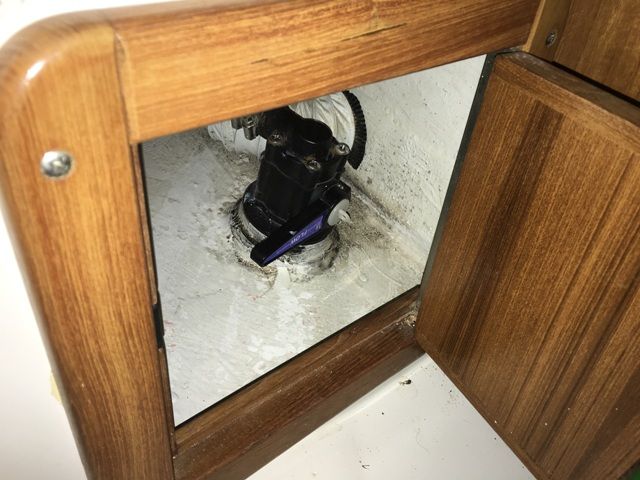
My forepeak water tank has a white cap on top with a bunch of ridges around the wdges. (I'd post a pic if I had it.) I've been unable to twist it off. Is this a removable inspection port? Is there a special tool for it?

#24
Main Message Board / Tiny, intermittent oil leak
November 04, 2018, 06:55:09 AM
I've had a couple times in the last month when I found a very small amount of oil (a few drops at most) under my motor. One time it was on the port side, another it was on the starboard side. In between those two occurrences, there were a couple times I motored and there was no oil leak apparent, including a 6 hour day of motoring with no oil drops observed. But the very next day I motored for another 6 hours (with some heeling during a couple 30 kt gusts) and found a couple drops of oil.

The two times I found oil I had motorsailed and had some heeling in the direction consistent with which side I found the oil. My guess is that there is a slow weeping through a seal somewhere which accumulates somewhere on the fins and other horizontal elements, and when the boat heels it falls off on the low side of the engine. It's also possible that the weeping of oil only occurs when the motor runs while the boat is heeling.

A couple of other notes: I have occasionally found tiny amount of oil on the engine housing this season. While I don't remember exact location, I do believe it was relatively high up on the motor. Also, I did have some water leakage from my Sherwood raw water pump in May which led me to have it rebuilt and to replace the raw water hose back to the HX. I did replace the flange gasket with the water pump. I've inspected the edge of the oil pan flange and noticed a tiny amount of corrosion around the very edge, but no signs that it's any more than superficial, and only about an inch long in one spot. (I'll recheck this next time I go to the boat.) Also, frequent checks of the dipstick verify that there is no measurable loss of oil. It's always at the top line on the stick.

I'd be interested in your suggestions on how to diagnose and locate the source of this small leak. Are there flange bolts I should tighten somewhere? I think it's overkill to remove/replace the oil pan at this point. Would prefer to eliminate other problems first.

The boat is now hauled out. I'll be changing the oil and winterizing in the next couple of days, so may not get much diagnosis done. I'll try to take a few pictures if I see anything interesting. I expect that running the motor for 20 minutes without any load (to heat up the oil) isn't going to put enough stress on it to see any leakage. Also there won't be any heeling with the boat on the stands (there better not be!!!).
#25
Hi all,

As some of you may have seen on another thread, I replaced the impeller on my Sherwood pump before splash, and immediately after splash experienced severe (4 drops/second) leakage from the weep holes. I replaced it with a brand new Sherwood G908 from Westerbeke (yes, I know that's a bad idea, but I had reasons that were specific to me). The new pump is generally better, weeping only about 1 drop per minute. However, my expectation was that zero drops should be seen on a brand new pump (unless there's some break-in period that I'm not aware of). I'll call the Westerbeke distributor Tuesday to inquire about whether I have a defective pump.

While there is absolutely no reason to believe that this leakage is caused by backpressure from a blockage or other problem in my heat exchanger or exhaust system, I do need to consider this possibility (especially since I expect that the Wb distributor will try to pin the blame on something else). I see lots of stuff on the Tech Wiki about replacing the exhaust riser, but not much about diagnosing the existing system to see if I actually have a problem there. Do any of you have any tricks to diagnose this without having to dismantle my exhaust riser, etc? Please post here or provide a link to existing posts/articles on the topic. Next time I'm at the boat I'll also remove the HX end plate to inspect, though last time I did this everything looked fine and I've never lost any impeller blades or anything else since then.

#26
I just learned of this pump. Looks like it addresses some of the (very few) issues with the Oberdorfer N202 pumps:

https://moyermarine.com/product/mmi-502-flange-pump-csob_00_365/


I searched all over this website for any mentions of this pump, and see nothing (aside from some replacement parts that Moyer sells for the Oberdorfer pumps). Is this pump a new offering? Does the flange look like it would fit on the B-series motors?
#27
Main Message Board / Leaky Coolant Hose M35B
December 29, 2017, 07:48:20 PM
I have a slow leak of antifreeze near the heat exchanger (rear) end of my M35B engine. I'm gradually narrowing down the exact location, and currently I think it's coming from the hose that runs into the port side of the HX. Tightening the hose clamp did not stop it. It may be somewhere else, but I'm starting to fear that there might be a crack near the end of the hose, which I assume will only get worse as the crack propagates. I may try a second hose clamp, but I'm coming to the realization that it may need to be replaced, since it's about the only hose left with original factory paint. The parts manual (#201021) identifies it as part #019059 (#15 in attached picture), 26" long x 7/8" wire inserted hose. Having never worked with wire-embedded hose, I'm concerned about how to make any tight bends that are needed. Is there a tool that I need to get? Do I take it to a shop to do the bends?

If I have to replace that hose, I might as well do the adjacent raw water hose (which is the other one still with factory paint), identified as #200439 (#16 in attached picture). This one has very intricate bends, and appears to be custom made by Westerbeke (since the parts manual does not even specify a length). Can you guys recommend a source for this one?
#28
Hi all, I just got back from a daysail in the hot sticky dead air of the Chesapeke. I ran the motor at 2400 RPM for awhile, which is a little faster than normal, to check for air leaks in the fuel system, since I just replaced the filters and had a little difficulty with air (fixed).

After I got back to the dock, I put the IR gun on a few things to verify temperature. I noticed that the case of the transmission (HBW-100 without any apparent cooling loop) was 145F. This was the first time I've checked the tranny temp, so I have no basis for comparison. But it did seem a little hot to me, so I was surprised.

I've searched for "Hurth temperature" on forums, TechWiki, TechNotes, and engine manual, and none of the hits referenced any recommended temparature range. I do recall awhile back seeing some generic (non-Universal) install info for Hurth transmissions where cooling loops were shown, but those apparently aren't standard issue on Catalina installs.

Maybe I'm too worried. Obviously the engine cooling loop is maintained at about 165F, so it's still cooler than that. It just surprised me because I'm not used to seeing something at 145F that can be so easily touched without some sort of guard on it. Insulation would prevent a burn to your hand, but would obviously make the temperature of the transmission even hotter.

What have you guys seen for the transmission temperature after sustained running?
#29
Main Message Board / Question about M35BC lift pump
July 09, 2017, 04:09:07 PM
I'm trying to diagnose an issue with plugged fuel filter and/or air leak into my fuel system. I know that the lift pump operates when the key is turned to glow plug position. Once the motor starts, does the lift pump continue to operate, or does suction from the high pressure injector pumps pull the fuel in without a lift pump? (Neither owners manual nor service manual is 100% clear on this, though there's a slight hint in the troubleshooting that the former is the case.) If it's actually the latter, does anyone know for sure whether the secondary pump is under negative pressure or positive pressure?

In a related question/comment, if the lift pump continues to operate when the motor is running, I assume that the excess fuel continuously recirculates back to the fuel tank, continuously polishing the fuel. Is that correct based on your understanding? (Note that this is an M35BC model.)

#30
Main Message Board / How high to raise the genoa?
April 25, 2017, 06:45:09 PM
Last summer we struggled with visibility problems under our 150 genoa. We also felt it was too large for spring/fall sailing, so we ordered a new 135. The sailmaker duplicated the luff length of the 150 when making the new sail.

When I raised the new 135 a few days ago, I discovered that it is possible to raise it significantly higher than our old sail was raised. When we bought the boat last summer, the owner's hired riggers attached the tack directly to a shackle on the furling drum. I didn't think anything of it, and it did not occur to me at the time that I could have raised it further. But when raising the new 135, I decided to improve visibility by raising the sail to where the tack is about 16" above the shackle, and to lash the tack to the shackle with some nylon braid (for now). See pic below.

I know that CE will be raised slightly by this, which could make the boat very slightly more tender. Another benefit is that the sail now fully clears the bow pulpit and lifelines. But are there any unanticipated issues that this could cause? Is there any chance of problems with halyard wrap?
#31
Hi all, Merry Christmas/Happy Holidays to all of you. The timing of this message has more to do with my free time (off from work) than any urgency, so please don't interrupt your holiday time to respond immediately. It can wait.

This winter I would like to replace my outdated non-DSC VHF radio. I have a very nice GX2150 VHF/DSC/AIS receiver that I brought over from my previous boat. But when I look at my current radio, I don't even know where to start to remove it. You can see in the attached pic that it's installed in the fiberglass liner beneath the electrical panel at the nav station.

Do I go in through the electrical panel from above? (There's a shelf that's in the way - I couldn't see whether it's removable.) Do I somehow remove the nav table and try to get there from below? (All the surrounding fiberglass seems to be one piece.)

I know that someone figured out how to install it in the first place, so there must be a way. I'm hoping one of you has done the job before and can give me some hints.
#32
I could use some help from experienced Catalina owners about a problem I'm having with the oil pressure/high temperature buzzer at the console (newer version located below the wheel).

My boat has been on the hard the past two weeks, and I went to run the motor to heat up the oil for an oil change. Upon turning the key, the alarm came on (as it does sometimes, but not always). But after starting up, the alarm continued.  I know it was not over temperature because it had just started up, temp gauge was still pegged at the bottom, water coming out of exhaust, and IR temperature gun showed no sign of overheating on the engine. Also, neither the oil pressure warning light or high temperature light were illuminated.

The buzzer has never gone off in this way throughout the season - only since the boat has been on the hard. I started the motor about 10 times, and the alarm was on for about 8 of the starts. So the problem seems to be intermittent, but happening about 80% of the time.

Other info:


  • When the motor first fires, tach goes up to 1000 for a split second, then drops to zero if the buzzer is on. During the two startups that the alarm did not sound, one time the tach read properly, and the other time it did not.

  • Outside temperature is in the mid 50s. Glow plugs were heated during first startup. Slight voltage drop indicated that they were active.

During the season I did notice a slight problem with the audio alarm, but it was different from this. When I first turned on the key prior to pressing the start button, sometimes the alarm would not sound immediately. When this happened, the alarm would usually come on when I first pressed the start button, then go off a second later after the engine started. As best as I can recall, the audible alarm generally would come on after stopping the motor until I turned the key off (as it should), but there might have been a time or two when it did not. In general, it seemed like this problem with the buzzer would be more likely to happen when things were cold, but I'm not sure of that. I have this issue on my list to fix, and if it's related to my new problem maybe I'll get a two-fer.

The simultaneous problem with the audio buzzer and the tachometer seems to me to point to an electrical connection, perhaps at a corroded common ground. (Would appreciate you help in telling me where this might be located.)  Also, the disappearance of the problem when things were warm could indicate that the corroded connection would heat up and then start to conduct, which of course could be a cause for other concerns.

At present I have not changed the oil due to other problems with my lousy pumping equipment. And I have not winterized because I know I'll want to turn over the motor again.  So I may have some time to try things before next spring if you have ideas.

It seems the Universal manual isn't the greatest help with this, since Catalina uses a custom control panel. Universal's "Captain Control Panel" looks pretty close, but not an exact match for Catalina's. And the Catalina manual seems to have nothing on this. So I come to you for advice. If there is something I'm missing in the manual, or a better version of the manual online, please point me in the right direction.

EDIT: I just started up one more time. This time the buzzer stayed on, but the tach worked. Arrgggh!
#33
Main Message Board / Rotella T vs. T4
November 13, 2016, 07:20:27 AM
I'm having a hard time finding Rotella T 15-40. I found a couple quart bottles in stock, but so far not enough of them to fill the motor. Can't find gallons, except at West Marine ($27/gallon, more than double the commodity retailers).

I am finding lots of gallon bottles of Rotella T4 (but can't find quart bottles of it  :? ). T4 seems to be a "new and improved" version. No sign that it's synthetic.

There is no sign of Rotella T on Shell's website, just T1 (straight grade, not multi grade), T4, T5 (synthetic), and T6 (synthetic):

http://rotella.shell.com/products.html

Searching here on "Rotella T4" generates no hits, so this would appear to be a new topic, and thus worthy of discussion.

It looks to me like Shell has realigned their product line to eliminate Rotella T and replaced it with "new and improved" T4.

How does this match up with your guys' experience? Do I really need to go out and get fleeced for an oil that I won't be able to top off next summer after the supply chain has exhausted its inventory?
#34
Main Message Board / Cooling water on the hard
October 06, 2016, 04:17:42 AM
Naive question here, but I have not been able to find an answer through searching:

This being my first inboard motor, I am curious how to best get cooling water to it for running while on the hard. I assume you get a hose to the raw water intake somehow, but how do you hold it up there? Is there a way to seal it? (Do they make the equivalent of outboard "earmuffs"?)

Similarly, how to you get antifreeze to the system? Is it also done from outside the hull, or do you introduce it somewhere under the aft berth?
#35
Main Message Board / Gradual loss of coolant
September 25, 2016, 07:02:12 PM
A couple of months ago I topped off the coolant in my reservoir up the the max fill line. I checked it today after returning from a weekend outing and noticed that it is about 1/4 up from the minimum line, so I topped it off again. Engine usage since I topped it up is about 15 hours. I see no clear sign of any leakage from the bottle into the locker or anywhere else, but I may not know all the places to look. Total engine hours is a about 495.

I am just wondering if this rate of loss is unusually high, and what it might indicate? (Leak in HX? Bad rings? Normal loss?)

FYI, I have never checked the zinc pencil in the HX - I have not yet even figured out exactly where the HX it is. (Wanted to look for it today after returning, but engine was still hot and I had to leave.) But surveyor checked it 3 months ago and said it was brand new, and HX had been recently acid washed, and water pump was brand new with pristine impeller. With engine running reliably at 165F, I have not had reason to be overly concerned about HX integrity or any other cooling issues. The lower level that I saw today was the first reason to have some concern.

Obviously I am going to check zinc pencil next time I go to the boat, but prior to that I would appreciate advice on what else to look for, or whether this consumption is normal.
#36
Main Message Board / Difficulty shifting into forward
September 16, 2016, 08:06:53 AM
My boat has some inconsistency when shifting into forward. I have had similar problems with charter boats before, so I think it may be a common problem.

Due to the shape of the Edson shift levers, they hit against the SS pedestal guard tube, preventing the levers from going forward as far as they might otherwise. As a result, it seems like the shift lever does not always get the boat into forward.

My workaround for now has been the same thing I did on similar charter boats: Push the shift lever into forward as firmly as I can, and wait a second until I hear it go into forward gear before I apply any additional throttle.

Once every few weeks it does not go into forward at all on the first try, and I need to pull the lever back to the neutral detente position and do it again. Fortunately this has not happened during any critical docking maneuvers. And so far, it has always gone into forward on the second attempt. I always worry that I may get to a point where it does not go into forward at all.

My concern is that if I attempt to adjust the shift cable to go into forward more readily, the boat may not go into reverse reliably, or may not go into neutral at the middle detent position. So before experimenting I thought I would pick your brains for any similar experiences and suggestions for how to solve this problem.
#37
I've registered for the Raymarine support forum, but their site admins are taking their dear old time approving my membership. In the meantime, I am hoping that one of you might have a hint or two to help me address my problem:

My configuration:

I have ST60 Wind, Speed, and Depth transducers, ST4000+ wheel pilot, and a Garmin 2010 chartplotter. These instruments came with my new (to me) boat. I did not install them.

My speed transducer's paddlewheel is sitting in the bilge. I have the blank in the through-hull, and have the speed control head set to display SOG.

My background:
I have had Raymarine ST60 instruments on a past boat, and have quite a bit of interfacing experience with SeaTalk and NMEA 0183 protocols.

What works:
My wind transducer shows apparent wind fine. It may need a little tweaking of the calibration, but it's not terrible, and I have more important things to fix first.

What's broken:
The wind transducer is not showing the correct true wind. It shows exactly the same speed for true wind that it does for apparent wind, regardless of speed or direction of the boat. True direction is also almost the same too (within a few degrees). I can be motoring 5 kts straight into a 5 kt wind, and both true and apparent wind will show up as 10 kts. I can be sailing on a broad reach, and true/apparent wind speed are the same, and direction almost exactly the same. The direction agrees with visual observation of my masthead Windex.

The first hypothesis might be that the instrument is not getting any speed data, or is getting a value of zero (since true=apparent when speed=0). But the speed control head shows SOG just fine. Although I have not opened up the NavPod to view the wiring, I assume that the chartplotter's output wires are connected to the NMEA input terminal on the Autopilot, and the Autopilot is passing that data through to the SeaTalk netowork. That's the only way I can see that the speed control head would be able to display SOG.

So this leaves the question: Why isn't the wind transducer making the appropriate vector calculations to display the correct true speed and direction?

I've looked through the manual and cannot find any settings to change speed input (for instance, from SOW to SOG). So I'm stumped.
#38
Main Message Board / Mainsail cover with Dutchman system
September 08, 2016, 09:23:54 AM
My boat came with a Dutchman system. So far it has been a love/hate relationship. It actually works great once I have it up, and the sail raises easily and drops down into nice flakes. But since my sail cover does not have any zippered slits, I need to take the Dutchman down every time I cover the sail. Regardless of how hard I try to stow it as a neat coil, it invariably ends up as a twisted, tangled mess that is a pain to re-raise after uncovering the sail. So, I am looking for ideas.

  • Do I have my sail cover modified with a couple zippered slits so I could leave it up? If so, are there any tricks to avoid rain from running down the monofilaments and onto the sail under the cover?
  • Do I just remove the whole thing and manually flake my sail?
  • Do I look into a Stack pack or Mack pack?
  • Other ideas?
Modifying my cover seems the most straightforward solution, but the cover is old and may not be worth modifying. And if I need to buy a new cover anyway, the stack pack options might be only a little more expensive.
#39
I have a very small rainwater leak that allows a cup of water or so after each rainstorm. It accumulates in the low spot under the aft berth near the raw water intake. Based on the contour of the hull, it could be coming from anywhere on the starboard side as far forward as the galley. This picture shows the location where it accumulates, although I removed the water before taking the picture:


I was on the boat just after a rainstorm last week and saw the water present, but was not able to trace the trickle of water to its source. I'll be unable to work on it again until I'm on the boat while it is raining, and that happens relatively infrequently. (I suppose I could douse it with water from a hose, though.)

FYI, the area stays bone dry unless it rains, so that seems to eliminate the domestic water system as a source of the leak.

Do any of you have experience with this, and can you suggest possible deck penetrations that are more likely than others to be the source?
#40
I just looked at the Fall 2016 Mainsheet issue, and enjoyed John Nixon's excellent article on the Raymarine ST4000 series autopilots. It came about a month too late for me, as I had already experienced an autopilot failure on my new (to me) Catalina 34 about 2 hours into my maiden voyage. It turned out to be a shredded/dryrotted drive belt, which was easily fixed as described here:

http://www.sailnet.com/forums/general-discussion-sailing-related/256778-need-help-diagnosing-raymarine-st4000-autopilot-post3575569.html#post3575569

I found a service manual online that helped to guide me through the repair, but John's article would have gotten me there faster, especially since it pointed me to the source for the aftermarket replacement belts (whom I found myself, but not until after much searching).

Although I am brand new to the black-ring Mk I version of the ST4000, my prior boat (C250WK) had the gray-ring Mk II version, so I've learned a number of things that apply to both. I'll share a few here:

  • Drive tension adjustment is critically important IMO. Too loose and the wheel will slip in heavy conditions, too tight and the clutch may fail to disengage. I believe that, for some people, this adjustment may be at the heart of the ratcheting noises that John describes (although the drive ring distortion that he describes is also an interesting observation the I'll have to look out for). The service manual describes a very detailed procedure for adjusting tension which involves measuring motor amperage under load, etc. I did not have the right electrical connectors for that, so instead I followed a different procedure described in the Sailnet link above.
  • A Google search revealed several complaints of clutches disengaging when the AP turns to port. I believe that root cause is the cam rollers (for clutch and also for tension adjustment) binding up and not rolling properly. Cleaning those rollers is very important, especially since they are at the bottom of the drive ring where organic matter can build up.
  • In his article (and several posts on this site and elsewhere), John and others describe the very common problem of autopilots oscillating port to starboard, and the oscillations getting gradually larger. Some knowledge of PID control theory can help diagnose this. Although I am not sure that the ST4000 is a full PID controller, the rudder gain adjustment is basically the "P" in PID, and general control theory says to use the minimum gain required to maintain a stable course. Too low and the boat will fall off in one direction; too high and the boat will experience growing oscillations in both directions like John described. I made a regular practice of adjusting the rudder gain to fit the sea state, and had set it up as one of the data pages on the control head to bring it up for quick adjustment by simply pushing the "Display" button. My personal experience (with my prior boat and with charter boats) is that high-power-draw settings that increase the AP's sensitivity and speed of adjustment can often make things worse. It's often better to reduce sensitivity so that the AP will ignore little disturbances and adjust for the big ones.
  • I also see a lot of issues with using the AP in following seas, just like many others. On my prior boat, I could never get the AP to work well in following seas. Once again, PID theory says that regular, slow period perturbations can be more difficult to any controller to overcome than random, quick ones. Most controllers do not know what is a random perturbation and what is a regularly repeating one. It just sees a change and adjusts, and when the perturbations happen slowly, it will get confused into thinking that it's a permanent change (like shift in wind or current) and attempt to follow it when it should just ignore it. Sometimes you just have to hand steer, because your brain can figure out which perturbations to ignore better than any AP can. It can also do a "feed forward loop" based on what your eyes see coming, whereas an AP can only do a "feedback loop" what it has already detected.

I have not yet tried the "Catalina cocktail" settings, but some of them look surprising to me. Do most of these C34 installs include a rudder position sensor? (I'm embarrassed to say that I don't know of my new boat has one - will check next time I go down there.) Some of the cocktail settings only have an effect if there is a rudder sensor.
#41
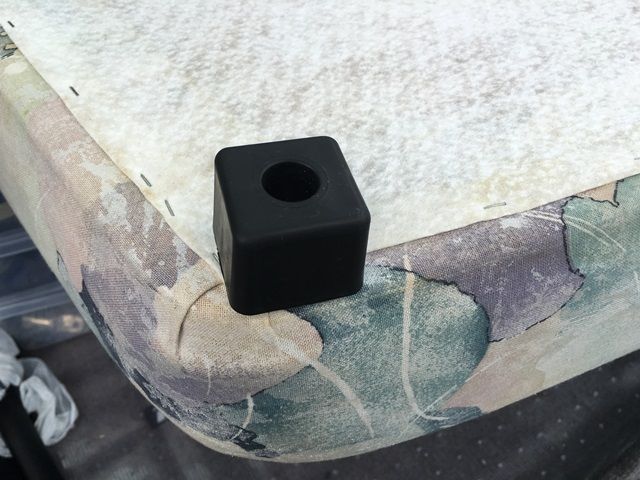
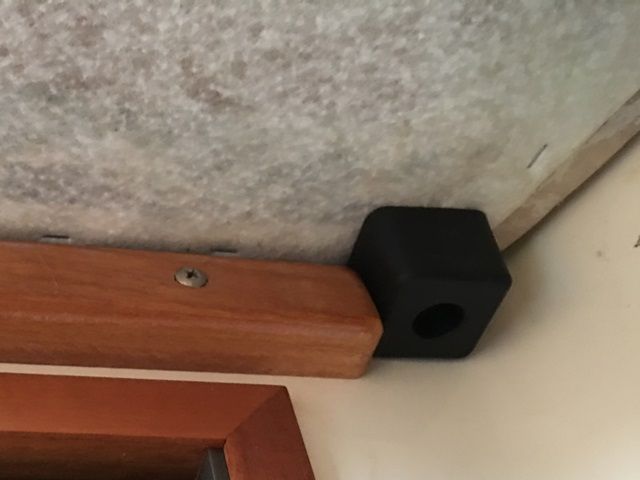
We haven't used the V-berth extension cushion because it was not secure. It seemed to drift aft, and I was afraid that it might fall off the wood furring strips that are meant to hold it up. I went below and found that the little round knobs were not providing a firm barrier to movement. So I picked up some larger square knobs off of Amazon.com and mounted them in the same holes as the originals. The fit was perfect, and much more secure. Now the cushion really stays in place:


For those who are curious, the additional wood frame under the furring strip in the second picture is a return duct for the reverse cycle system, which is mounted under the V-berth.
#42
Main Message Board / Talkin' Trash: MkII edition
July 02, 2016, 05:33:59 PM
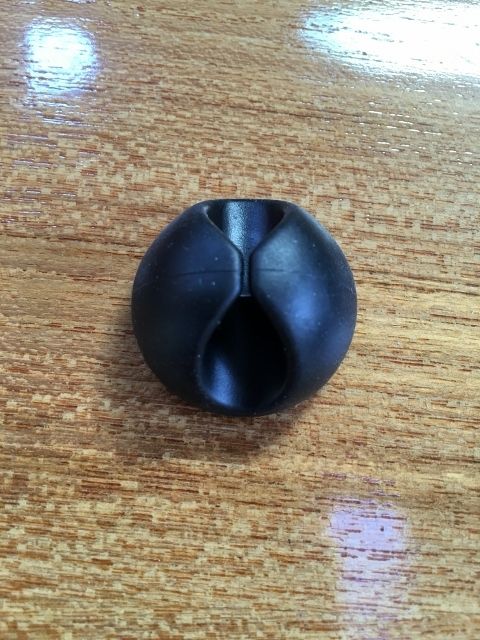
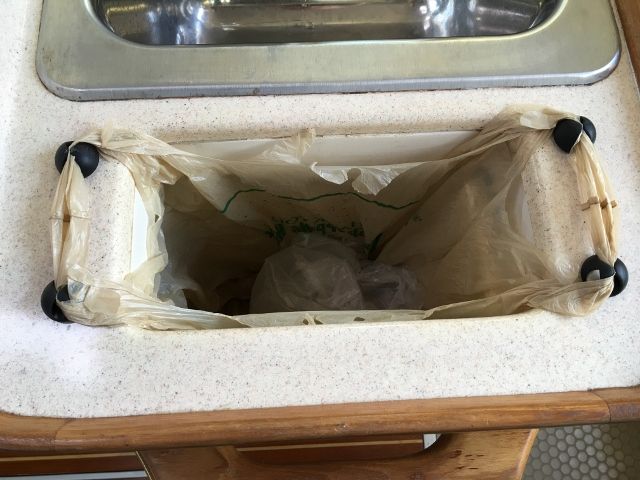
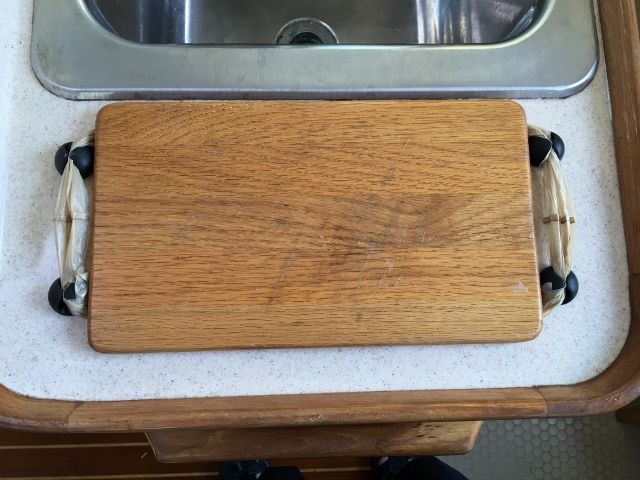
I love the little trash cubbies that they put in the MkII version. Pulling out the trash can to empty it? Not so much love.  :(

Thus, my first major upgrade to my new (to me) boat, using a few simple stick-on wire guides available at the office supply store.


#43
The lender for my soon-to-be new-to-me 2001 C34MkII is asking for the serial number of the Universal M35 motor. My surveyor has visited the boat twice, and cannot find the serial number.

Can any of you tell us where it is located?

Thanks,

Rick
#44
Hi all, I am current owner of Take Five, 1998 Catalina 250WK. We are driving down to see a nicely equipped C34MkII this afternoon. We've discussed when and how to upsize for 6 years, and it sounds like my wife is ready to let me pull the trigger on this if it's in nice condition.

I'm open to suggestions on what to look for this afternoon.